Christmas Tree Oreos
There’s something magical about the holiday season, the twinkling lights, the scent of cinnamon and pine in the air, and of course, all the delicious treats that make Christmas extra special.
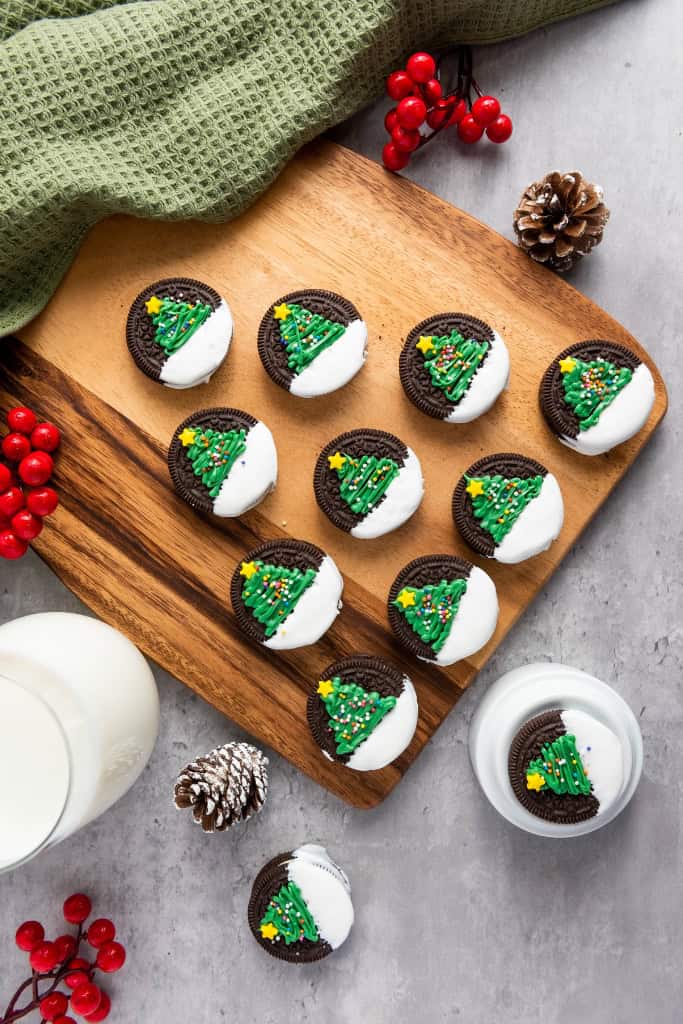
If you’re looking for a fun and easy festive dessert, these Christmas Tree Oreos are perfect! They’re simple enough to make with kids, require just a handful of ingredients, and look absolutely adorable on a holiday dessert table. Plus, they taste amazing, because let’s be honest, you can never go wrong with Oreos and chocolate.
Why You’ll Love These Christmas Tree Oreos
One of my favorite things about this recipe is how effortless it is. These festive snacks come together in just a few steps. Whether you’re making them for a Christmas party, packaging them up as edible gifts, or just enjoying them with a cup of hot cocoa by the fire, these festive Oreos are sure to bring smiles all around.
Here’s What You’ll Need

Step-by-Step Instructions
1. Melt the Candy
First things first, let’s melt the candy melts.
- Melt the white candy melts according to the package instructions until they’re smooth and creamy.
- In a separate bowl, melt the green candy melts until they’re silky and ready to drizzle.
Pro Tip: If the candy melts are too thick, you can add a tiny bit of vegetable oil or coconut oil to help thin them out for easier dipping and piping.
2. Dip the Oreos
- Take each Oreo and dip the bottom half into the melted white candy coating.
- Gently tap the fork on the side of the bowl to let the excess chocolate drip off.
- Place the dipped Oreos onto a parchment-lined baking sheet or plate.
This creates a “snowy” base for your Christmas trees, so cute and festive!
3. Create the Christmas Trees
Now for the fun part, decorating!
- Transfer the melted green candy melts into a piping bag (or use a zip-top bag with a small corner snipped off).
- Drizzle the green candy in a zigzag pattern over the top half of each Oreo, mimicking the shape of a Christmas tree.
No piping bag? No problem! You can also use a spoon to drizzle the green candy melts. It may be a little messier, but that’s part of the holiday fun!
4. Decorate the Trees
While the green candy is still wet:
- Place a star sprinkle at the top of each tree.
- Sprinkle nonpareils over the trees for that perfect finishing touch.
The sprinkles act as tiny ornaments, making each Christmas tree Oreo look even more festive and fun.

5. Set and Serve
- Let the cookies set completely. You can leave them at room temperature, but if you’re short on time, pop them into the refrigerator for about 10 minutes.
- Once they’re firm, gently remove them from the baking sheet and they’re ready to serve!
How to Store Christmas Tree Oreos
If you’re not serving these right away, store them in an airtight container at room temperature for up to one week. These also make wonderful homemade gifts, just package them in festive treat bags or a holiday cookie tin for a sweet surprise.
Fun Variations to Try
- Chocolate Lover’s Twist: Use chocolate-dipped Oreos as the base instead of white candy melts for a richer flavor.
- Peppermint Magic: Add crushed candy canes on top for a minty crunch.
- Colorful Trees: Use red and gold sprinkles to make them even more dazzling.
- Glittery Shine: A little edible gold dust or shimmer spray can make these even more magical!

Perfect for Holiday Parties & Gifts
These Christmas Tree Oreos aren’t just a hit at home, they’re also perfect for holiday parties, cookie exchanges, or even as a cute addition to a holiday dessert board.
So go ahead, gather your ingredients, get the family involved, and make a batch (or two) of these adorable Christmas Tree Oreos.
View More Christmas Snacks

Christmas Tree Oreos
Ingredients
- 12 Oreo cookies
- 1 cup green candy melts
- 1/2 cup white candy melts
- 12 star sprinkles
- 1 teaspoon nonpareil sprinkles
Instructions
- Melt the white candy melts according to the package instructions until they’re smooth and creamy.
- In a separate bowl, melt the green candy melts until they’re silky and ready to drizzle.Pro Tip: If the candy melts are too thick, you can add a tiny bit of vegetable oil or coconut oil to help thin them out for easier dipping and piping.
- Take each Oreo and dip the bottom half into the melted white candy coating. Gently tap the fork on the side of the bowl to let the excess chocolate drip off.
- Place the dipped Oreos onto a parchment-lined baking sheet or plate. This creates a “snowy” base for your Christmas trees, so cute and festive!
- Transfer the melted green candy melts into a piping bag (or use a zip-top bag with a small corner snipped off).
- Drizzle the green candy in a zigzag pattern over the top half of each Oreo, mimicking the shape of a Christmas tree.
- No piping bag? No problem! You can also use a spoon to drizzle the green candy melts. It may be a little messier, but that’s part of the holiday fun!
- While the green candy is still wet: Place a star sprinkle at the top of each tree.
- Sprinkle nonpareils over the trees for that perfect finishing touch. The sprinkles act as tiny ornaments, making each Christmas tree Oreo look even more festive and fun.
- Let the cookies set completely. You can leave them at room temperature, but if you’re short on time, pop them into the refrigerator for about 10 minutes.
- Once they’re firm, gently remove them from the baking sheet and they’re ready to serve!