Easy Red Velvet Truffles
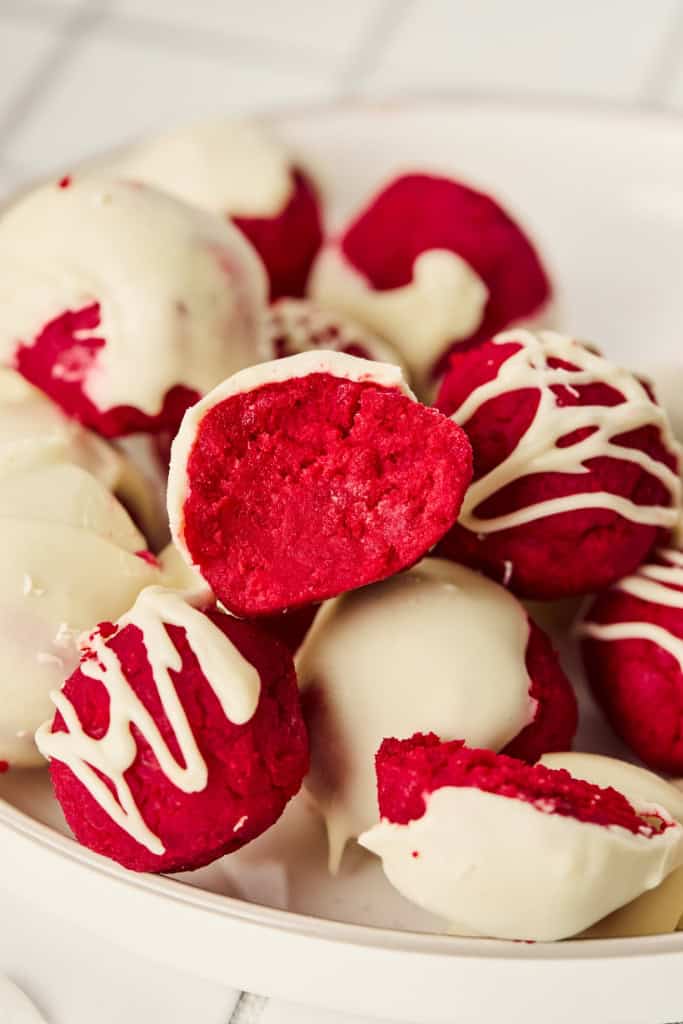
Think of these Red Velvet truffles as little red velvet cake pops without the stick, dipped in smooth white chocolate, with just enough decoration to make them feel festive. They’re perfect for parties, potlucks, Valentine’s Day, Christmas, or even just a random weeknight when you need something sweet. And because they’re bite-sized, kids love them, adults love them, and you’ll love how easy they are to make.
Why You’ll Love These Red Velvet Truffles
Before we get into the nitty-gritty of the recipe, let me share why these truffles have become a family favorite in my house:
- Super easy – No complicated steps or fancy equipment needed. If you can bake a cake and roll a ball, you’ve got this.
- Make-ahead friendly – You can prep them the day before a party (or even a couple of days ahead), and they’ll still taste amazing.
- Crowd-pleaser – I have yet to meet someone who turns down red velvet and cream cheese frosting.
- Kid-friendly fun – Rolling the cake balls and decorating them with sprinkles is the perfect “little helper” job for kids.
- Customizable – White chocolate, dark chocolate, sprinkles, drizzle you can really make these your own.
And if you’re like me and love having a recipe that looks fancier than it is, this one is gold.

Ingredients You’ll Need
Here’s what goes into these little bites of heaven (makes about 24 truffles):
Here’s What You’ll Need

Step-by-Step Instructions
1. Bake the cake
Follow the instructions on the back of your red velvet cake mix. Once it’s baked, let it cool completely. And when I say completely, I mean totally cooled otherwise you’ll end up with a melty mess when you try to mix in the frosting.
Tip: If you’re short on time, you can pop the cake in the fridge for 30 minutes to speed up the cooling process.

2. Crumble the cake
Once cooled, crumble the cake into a big bowl. You can use a fork, but honestly, I just use my hands it’s quicker and kind of fun. The goal is fine, even crumbs with no big chunks.

3. Mix with frosting
Add about ½ cup of cream cheese frosting to the crumbs and mix it all together. You want the texture to be like soft dough that holds together when you press it. If it feels too dry, add a little more frosting.

4. Roll into balls
Scoop out the mixture (a small cookie scoop works perfectly!) and roll into 1-inch balls. Place them on a parchment-lined tray. Pop the tray into the freezer for 20–30 minutes this helps them firm up so they don’t fall apart when you dip them.

5. Coat with chocolate
Melt your white chocolate or candy melts in the microwave, stirring every 20–30 seconds until smooth. Take your chilled cake balls and dip them into the coating using a fork makes this easier. Let any excess drip off before placing them back on the tray.

6. Decorate
While the coating is still soft, drizzle melted red candy melts over the top. A piping bag works, but I’ve been known to just use a spoon and go with it nobody minds if they’re a little messy! Add sprinkles if you’re using them.
7. Chill
Pop the tray into the fridge for about 20 minutes until the coating is set. Once firm, transfer to an airtight container and keep them in the fridge for up to 5 days.

Tips for Success
- Don’t skip the chilling step. Rolling and dipping is so much easier when the cake balls are cold.
- Work in small batches. If you leave all the cake balls out while dipping, the ones at the end will warm up and get crumbly. Keep some in the fridge while you dip the rest.
- Thin out the chocolate if needed. If your coating feels too thick, add a teaspoon of vegetable oil or coconut oil to loosen it up.
- Get creative with toppings. Swap heart sprinkles for holiday ones, add edible glitter, or go for a drizzle of dark chocolate.
Fun Variations
Want to switch things up a little? Here are some easy ways to make these truffles fit any occasion:
- Holiday version – Use green candy melts for drizzle and red/green sprinkles.
- Birthday version – Skip the drizzle and roll the truffles in rainbow sprinkles instead.
- Grown-up twist – Add a tiny splash of liqueur (like Baileys or Kahlua) to the cake-frosting mixture before rolling.
- Different chocolate – Try dipping in dark or milk chocolate if white isn’t your favorite.
When to Serve Red Velvet Truffles
The short answer? Anytime. But here are a few occasions where they shine:
- Valentine’s Day – They’re red, they’re sweet, and they’re perfect with little heart sprinkles.
- Christmas parties – A tray of red and white truffles looks so festive on a holiday dessert table.
- Birthday parties – Kids love them because they’re bite-sized (and parents love that they’re less messy than cupcakes).
- Potlucks or office treats – These travel well and always disappear quickly.
- Date night at home – Pair with a glass of wine and thank me later.
Storing and Freezing
- Refrigerator: Keep in an airtight container in the fridge for up to 5 days.
- Freezer: You can freeze them (without the coating) for up to 2 months. Just thaw in the fridge before dipping in chocolate.

Red Velvet Truffles are simple, sweet, and guaranteed to put a smile on everyone’s face. Whether you’re hosting a party, surprising someone you love, or just treating yourself after a long week, these little truffles deliver every single time.
And trust me, once you make them, you’ll start looking for excuses to whip up another batch.
View More Truffle Recipes

Easy Red Velvet Truffles
Ingredients
- 1 box red velvet cake mix plus eggs and milk or oil just follow the package directions
- ½ cup cream cheese frosting store-bought or homemade, either works!
- 300 g white chocolate or white candy melts (10 oz ) for coating
- Red candy melts or colored white chocolate for drizzle
- Heart sprinkles optional, but so cute for Valentine’s Day or birthdays
Instructions
- Follow the instructions on the back of your red velvet cake mix. Once it’s baked, let it cool completely. And when I say completely, I mean totally cooled otherwise you’ll end up with a melty mess when you try to mix in the frosting.Tip: If you’re short on time, you can pop the cake in the fridge for 30 minutes to speed up the cooling process.
- Once cooled, crumble the cake into a big bowl. You can use a fork, but honestly, I just use my hands it’s quicker and kind of fun. The goal is fine, even crumbs with no big chunks.
- Add about ½ cup of cream cheese frosting to the crumbs and mix it all together. You want the texture to be like soft dough that holds together when you press it. If it feels too dry, add a little more frosting.
- Scoop out the mixture (a small cookie scoop works perfectly!) and roll into 1-inch balls. Place them on a parchment-lined tray. Pop the tray into the freezer for 20–30 minutes this helps them firm up so they don’t fall apart when you dip them.
- Melt your white chocolate or candy melts in the microwave, stirring every 20–30 seconds until smooth. Take your chilled cake balls and dip them into the coating using a fork makes this easier. Let any excess drip off before placing them back on the tray.
- While the coating is still soft, drizzle melted red candy melts over the top. A piping bag works, but I’ve been known to just use a spoon and go with it nobody minds if they’re a little messy! Add sprinkles if you’re using them.
- Pop the tray into the fridge for about 20 minutes until the coating is set. Once firm, transfer to an airtight container and keep them in the fridge for up to 5 days.


