Pistachio Raspberry Mini Cheesecakes
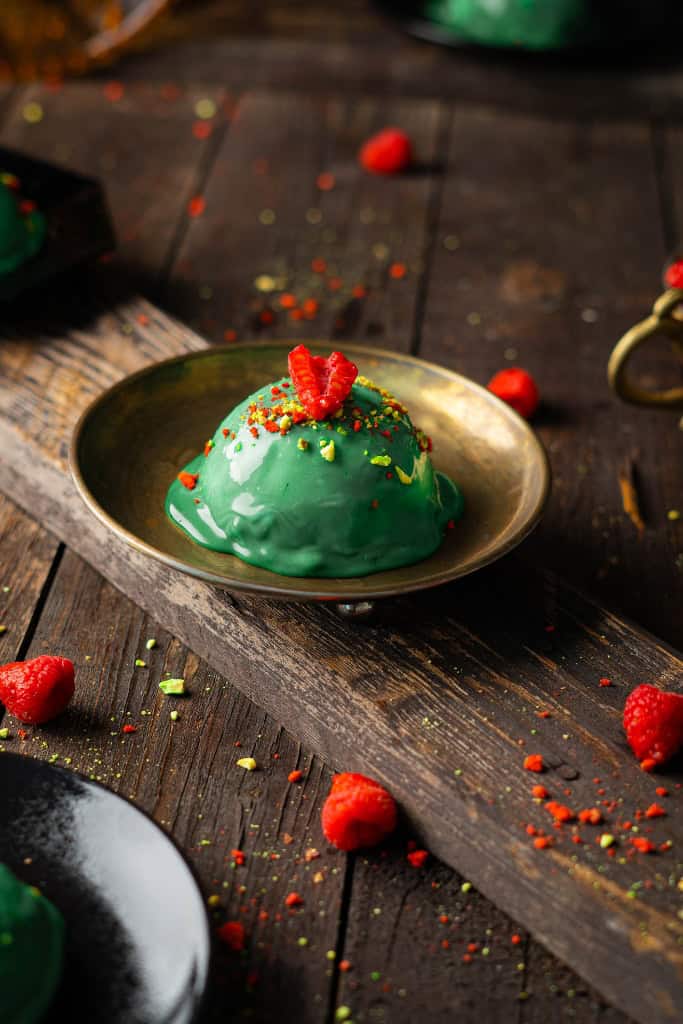
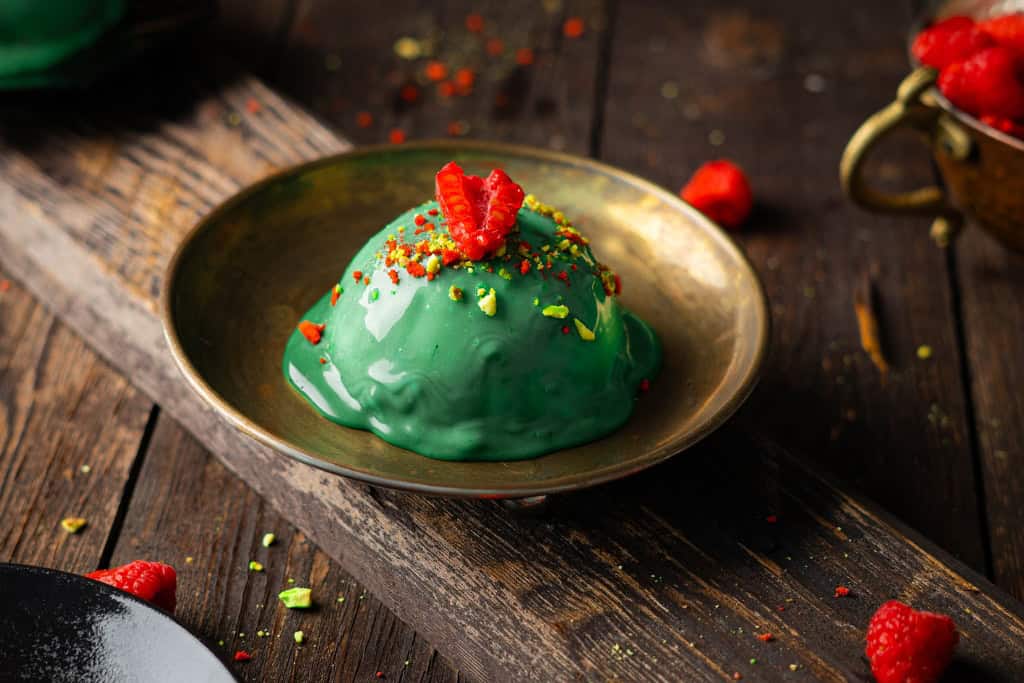
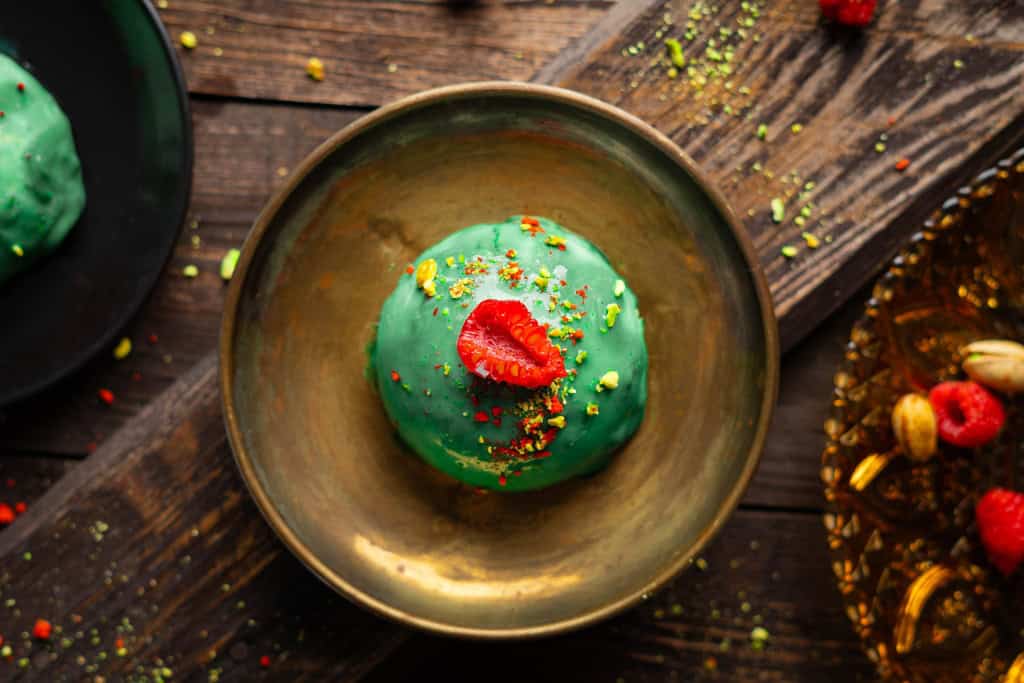
This Pistachio Raspberry Mini Cheesecakes have a soft pastel green glaze, a little sparkle of crushed pistachios on top, and that surprise pop of ruby-red raspberry hiding inside.
They’re elegant. They’re fun and they’re make-ahead.
Why These Mini Domes Are Perfect for Gatherings
A few reasons you’ll love them:
They’re no-bake (mostly!)
- Besides the quick pistachio sponge, everything else is chilled or frozen super manageable, even on a busy day.
They freeze well
- Make them a day ahead… or even two. The flavor and texture stay dreamy.
They portion themselves
- You get six perfect domes no slicing, no messy leftovers, no kids arguing about who got the bigger piece.
They feel fancy with minimal fuss
- The glaze looks like pastry-chef magic without any complicated sugar work.
They offer the BEST flavor combo
- Pistachio + raspberry = rich, nutty, tangy, sweet everything balances in the loveliest way.
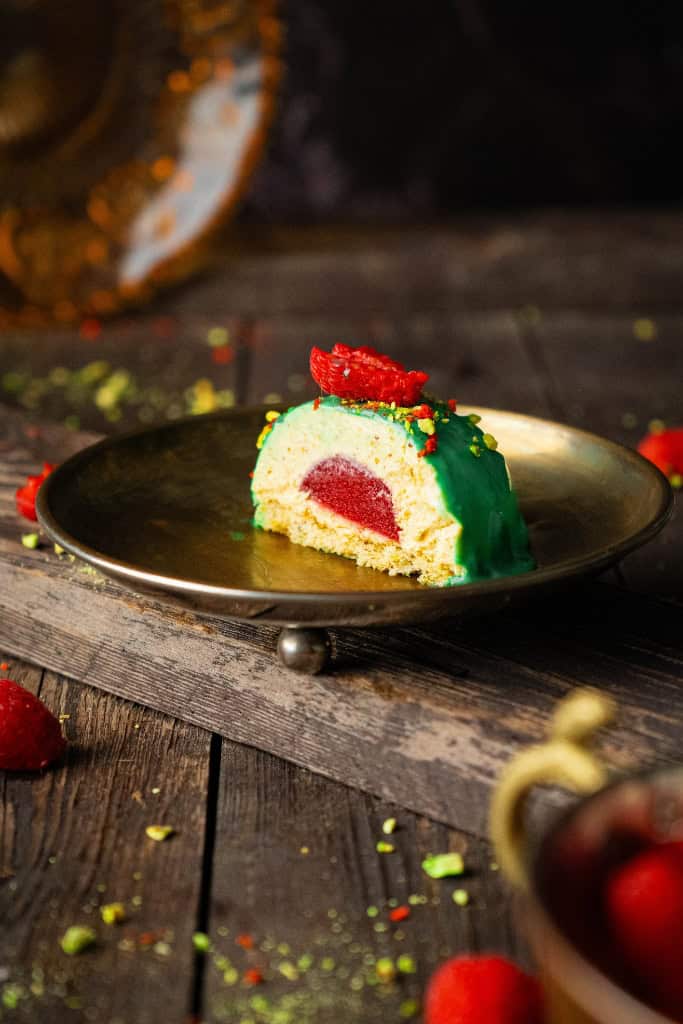
Pistachio Raspberry Mini Cheesecake Domes
Light, nutty pistachio cheesecake is wrapped around a bright, tart raspberry center, all sitting on top of a soft pistachio sponge base. A white chocolate glaze finishes everything off with a gorgeous shine. These domes are perfect for birthdays, Mother’s Day, bridal showers, baby showers, Christmas, or even those moments when you just want something beautiful to share.
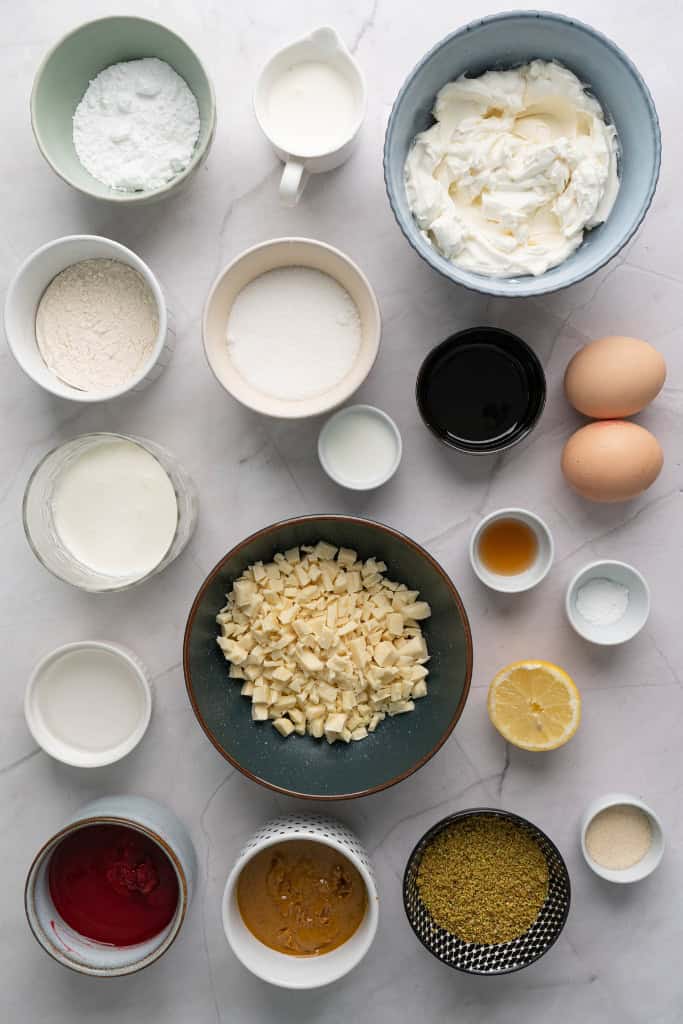
Ingredients
Here’s What You’ll Need
Pistachio Sponge Base
Raspberry Gelée Center
Pistachio Cheesecake Filling
White Chocolate Glaze
Step-by-Step Instructions
1. Make the Raspberry Gelée (the fruity surprise!)
This little center is the star of the show.
- Sprinkle the gelatin over the cold water in a tiny bowl. Let it sit and “bloom” for 5 minutes.
- Add raspberries, sugar, and lemon juice to a small saucepan. Warm it gently over medium heat until the berries soften and break apart. Mash lightly and let it simmer 2–3 minutes.
- Remove from the heat and stir in your softened gelatin until everything melts together.
- Spoon the mixture into small dome molds or even a silicone ice cube tray.
- Freeze until solid about 1 hour.
This step can be done the night before if you want to get ahead.

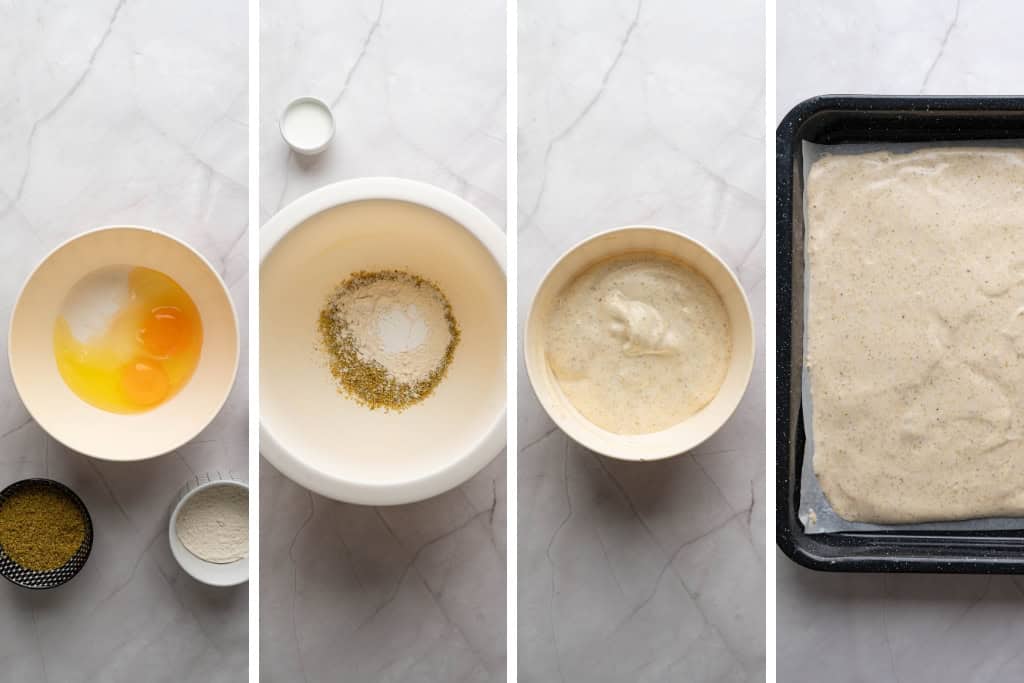
2. Make the Pistachio Sponge
Soft, light, and just nutty enough it gives the whole dessert something to sit on, which means less mess and more stability.
- Preheat your oven to 350°F (175°C) and line a baking tray with parchment.
- Beat the eggs and sugar together until they’re light and fluffy about 3–4 minutes. This gives your sponge its bounce.
- In a separate bowl, mix the pistachio flour, all-purpose flour, and baking powder.
- Fold those dry ingredients slowly into your egg mixture.
- Stir in the milk.
- Spread the batter thinly and evenly onto the baking sheet.
- Bake for 10–12 minutes, just until lightly golden.
- Cool completely, then cut out circles slightly smaller than your dome molds.
Tip: If your circles aren’t perfect nobody will know. They get tucked underneath!
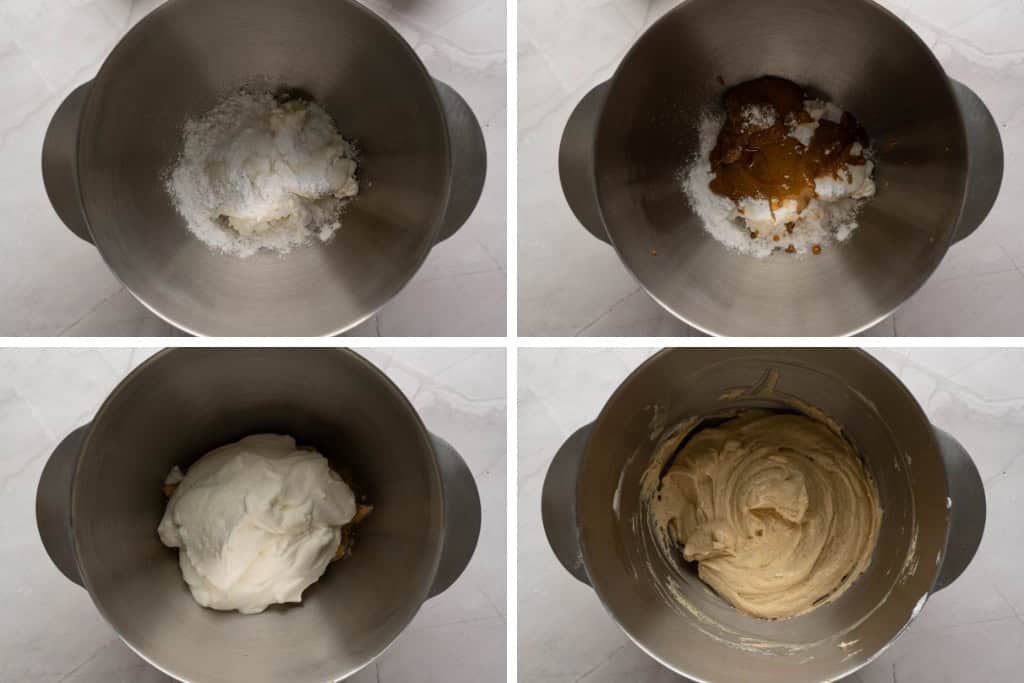
3. Prepare the Pistachio Cheesecake Filling
This is the part where you’ll probably want to sneak a taste, because it’s unbelievably good.
- Sprinkle the gelatin over cold water and let it bloom for 5 minutes.
- Beat together the softened cream cheese, powdered sugar, pistachio paste, and vanilla until smooth and creamy.
- In another bowl, whip your cold heavy cream to soft peaks.
- Gently warm the bloomed gelatin for about 5–10 seconds in the microwave just until melted.
- Stir the melted gelatin into your cream cheese mixture.
- Fold in the whipped cream.
You’ll end up with a light, airy pistachio mousse-style cheesecake filling that tastes like heaven.
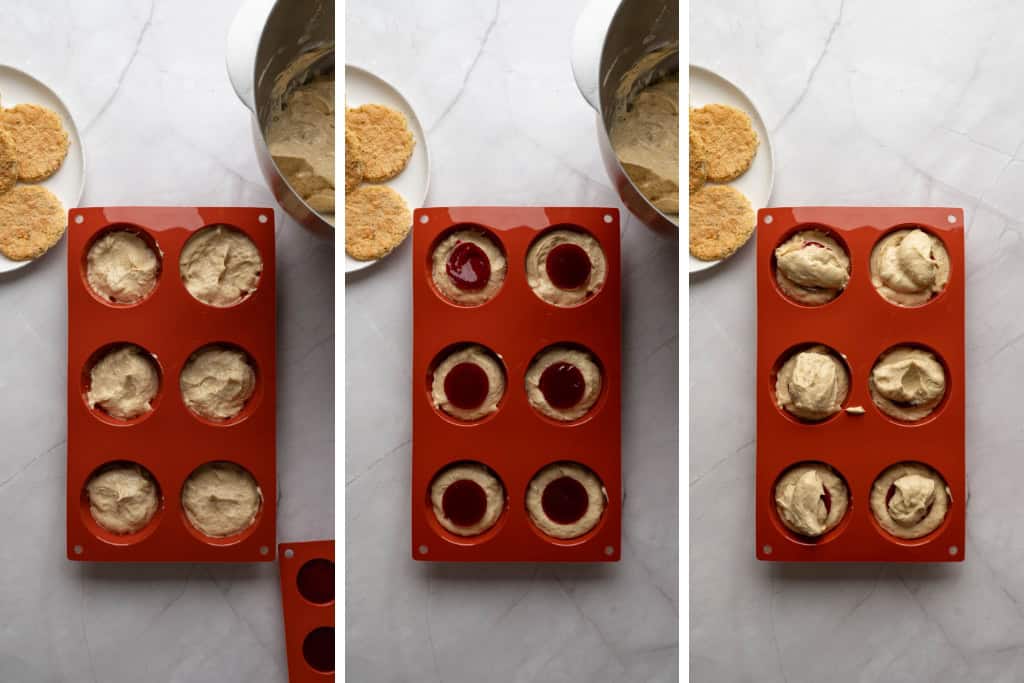
4. Assemble the Domes
- Spoon the pistachio cheesecake mixture halfway into your dome molds.
- Add a frozen raspberry gelée insert in the center of each dome.
- Cover with more cheesecake filling.
- Leave just enough room to press in your sponge circles.
- Freeze the whole tray for at least 4–6 hours, or overnight for best results.
Freezing helps them unmold cleanly and makes glazing so much easier.
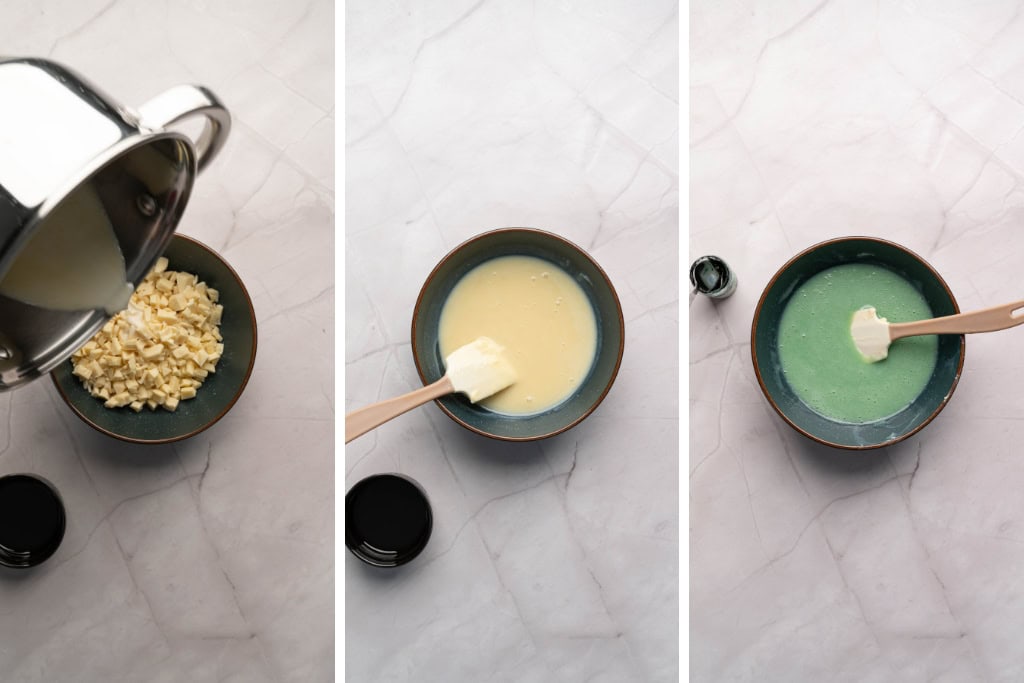
5. Make the White Chocolate Glaze
- Heat the heavy cream until it just begins to simmer.
- Pour it over your chopped white chocolate. Let it sit one minute.
- Stir slowly until everything melts into a silky glaze.
- Add a little neutral oil for shine if you like.
- Add green food coloring if you want that pistachio vibe.
- Let the glaze cool a bit it should be pourable but slightly thickened.
If it’s too hot, it’ll slide right off. A few minutes of patience makes a huge difference.
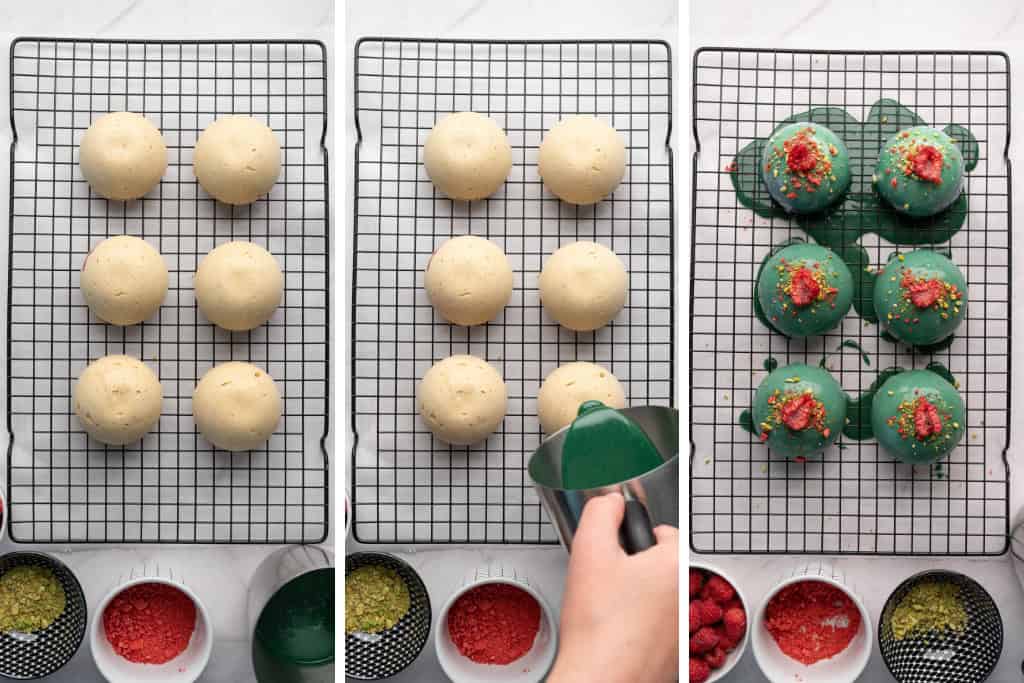
6. Finish and Serve
- Pop your frozen domes out of the molds and place them on a wire rack with a tray underneath.
- Slowly pour the glaze over each one, letting it drip and coat beautifully.
- Add crushed pistachios, freeze-dried raspberries, or even edible flowers for a little flair.
- Chill in the fridge for an hour before serving.
Tips, Tricks & Helpful Notes
Use silicone molds
They’re flexible and make unmolding a breeze.
Use good-quality pistachio paste
It makes a huge difference in flavor.
Make ahead
These domes stay gorgeous in the freezer for up to 1 week.
Serve slightly chilled
They taste best when not frozen solid creamy, soft, and dreamy.
Swap flavors if needed
This recipe is flexible! Try:
- Mango gelée
- Strawberry gelée
- Blueberry-lime gelée
- Hazelnut cheesecake + chocolate center
A fun little twist goes a long way.
How to Present Them at Parties
Here are some cute serving ideas:
- Place each dome in a cupcake liner for easy lifting.
- Arrange them on a tiered stand for instant “wow.”
- Add a sprinkle of edible glitter for holiday parties.
- For baby showers, tint the glaze pastel pink or blue.
- Add tiny heart sprinkles for Valentine’s Day.
Whether you’re hosting a birthday, surprising your family with a treat, or adding something beautiful to the dessert table, these single serve desserts really are the best mix of simple steps and showstopping results.
If you give them a try, you’ll quickly see why they’ve become one of my go-to “wow” desserts the kind that gets people smiling before they even take a bite.
View More Cheesecake Recipes
- Churros Cheesecake Bars
- Strawberry No Bake Cheesecake
- No Bake Oreo Cheesecake
- Mini Pistachio Cheesecakes
- No Bake Biscoff Cheesecake
- Strawberry Cheesecake
- Halloween Candy Corn Cheesecakes

Pistachio Raspberry Mini Cheesecakes
Ingredients
Pistachio Sponge Base
- 2 large eggs
- ⅓ cup granulated sugar 70 g
- ¼ cup pistachio flour (finely ground pistachios) 25 g
- ¼ cup all-purpose flour 30 g
- ½ teaspoon baking powder 2 g
- 1 tablespoon milk 15 ml
Raspberry Gelée Center
- ½ cup fresh or frozen raspberries 70 g
- 1 tablespoon granulated sugar 12 g
- ½ teaspoon lemon juice 2.5 ml
- 1 teaspoon powdered gelatin 3 g
- 1 tablespoon cold water 15 ml
Pistachio Cheesecake Filling
- 1½ teaspoons powdered gelatin 4.5 g
- 2 tablespoons cold water 30 ml
- ½ cup heavy cream, cold 120 ml
- 8 oz cream cheese, softened 225 g
- ⅓ cup powdered sugar 40 g
- ⅓ cup pistachio spread or paste 80 g
- ½ teaspoon vanilla extract 2.5 ml
White Chocolate Glaze
- 4 oz white chocolate, finely chopped 115 g
- ¼ cup heavy cream 60 ml
- ½ teaspoon neutral oil, optional, for shine 2.5 ml
- Green food coloring, optional
Instructions
Make the Raspberry Gelée (the fruity surprise!)
- Sprinkle the gelatin over the cold water in a tiny bowl. Let it sit and “bloom” for 5 minutes.
- Add raspberries, sugar, and lemon juice to a small saucepan. Warm it gently over medium heat until the berries soften and break apart. Mash lightly and let it simmer 2–3 minutes.
- Remove from the heat and stir in your softened gelatin until everything melts together.
- Spoon the mixture into small dome molds or even a silicone ice cube tray.
- Freeze until solid about 1 hour.This step can be done the night before if you want to get ahead.
Make the Pistachio Sponge
- Preheat your oven to 350°F (175°C) and line a baking tray with parchment.
- Beat the eggs and sugar together until they’re light and fluffy about 3–4 minutes. This gives your sponge its bounce.
- In a separate bowl, mix the pistachio flour, all-purpose flour, and baking powder.
- Fold those dry ingredients slowly into your egg mixture.
- Stir in the milk.
- Spread the batter thinly and evenly onto the baking sheet.
- Bake for 10–12 minutes, just until lightly golden.
- Cool completely, then cut out circles slightly smaller than your dome molds.Tip: If your circles aren’t perfect nobody will know. They get tucked underneath!
Prepare the Pistachio Cheesecake Filling
- Sprinkle the gelatin over cold water and let it bloom for 5 minutes.
- Beat together the softened cream cheese, powdered sugar, pistachio paste, and vanilla until smooth and creamy.
- In another bowl, whip your cold heavy cream to soft peaks.
- Gently warm the bloomed gelatin for about 5–10 seconds in the microwave just until melted.
- Stir the melted gelatin into your cream cheese mixture.
- Fold in the whipped cream.You’ll end up with a light, airy pistachio mousse-style cheesecake filling that tastes like heaven.
Assemble the Domes
- Spoon the pistachio cheesecake mixture halfway into your dome molds.
- Add a frozen raspberry gelée insert in the center of each dome.
- Cover with more cheesecake filling.
- Leave just enough room to press in your sponge circles.
- Freeze the whole tray for at least 4–6 hours, or overnight for best results.Freezing helps them unmold cleanly and makes glazing so much easier.
Make the White Chocolate Glaze
- Heat the heavy cream until it just begins to simmer.
- Pour it over your chopped white chocolate. Let it sit one minute.
- Stir slowly until everything melts into a silky glaze.
- Add a little neutral oil for shine if you like.
- Add green food coloring if you want that pistachio vibe.
- Let the glaze cool a bit it should be pourable but slightly thickened.If it’s too hot, it’ll slide right off. A few minutes of patience makes a huge difference.
Finish and Serve
- Pop your frozen domes out of the molds and place them on a wire rack with a tray underneath.
- Slowly pour the glaze over each one, letting it drip and coat beautifully.
- Add crushed pistachios, freeze-dried raspberries, or even edible flowers for a little flair.
- Chill in the fridge for an hour before serving.


