Chicken Chimichangas
Chicken Chimichangas (Crispy, Golden & Family-Approved)
These are crispy on the outside, warm and cheesy on the inside, and packed with tasty flavors that everyone will love. And if your house is anything like mine, anything that can be picked up with your hands instantly feels more fun.
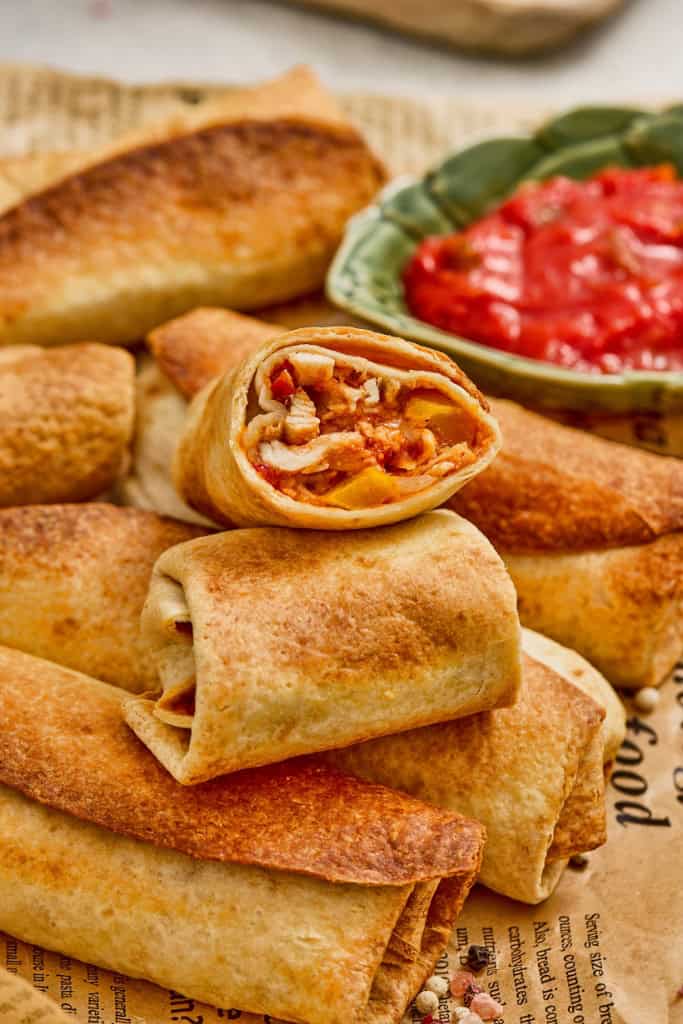
These Chicken Chimichangas are quick enough for a busy weeknight, but special enough to serve when friends pop over or when you’re hosting a casual get-together. And the best part? You can fry them for that classic crunchy finish or bake them if you want to keep things lighter both ways turn out delicious.
Why You’ll Love These Chicken Chimichangas
You know those recipes that just work every time? This is one of them.
- Quick and easy – ready in under 40 minutes from start to finish
- Perfect for families – mild enough for kids, easy to spice up for adults
- Great for gatherings – serve with toppings and let everyone build their own plate
- Flexible cooking options – fry for crispy indulgence or bake for a lighter version
- Make-ahead friendly – perfect for prepping before guests arrive
Chicken Chimichangas Recipe
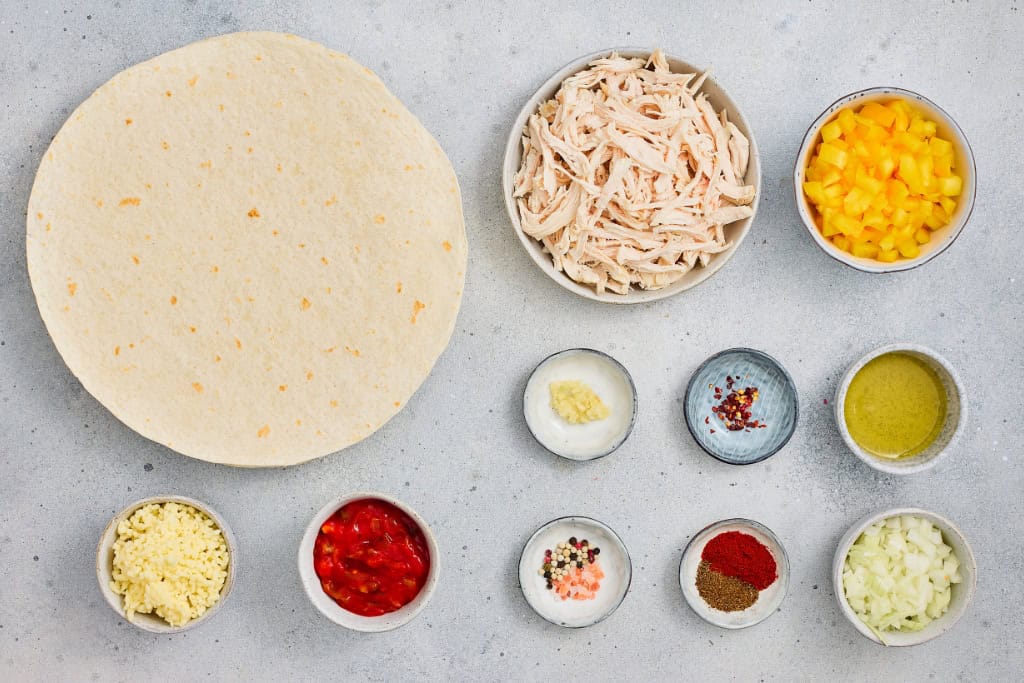
Ingredients
Chicken Filling
Assembly
Step-by-Step Instructions
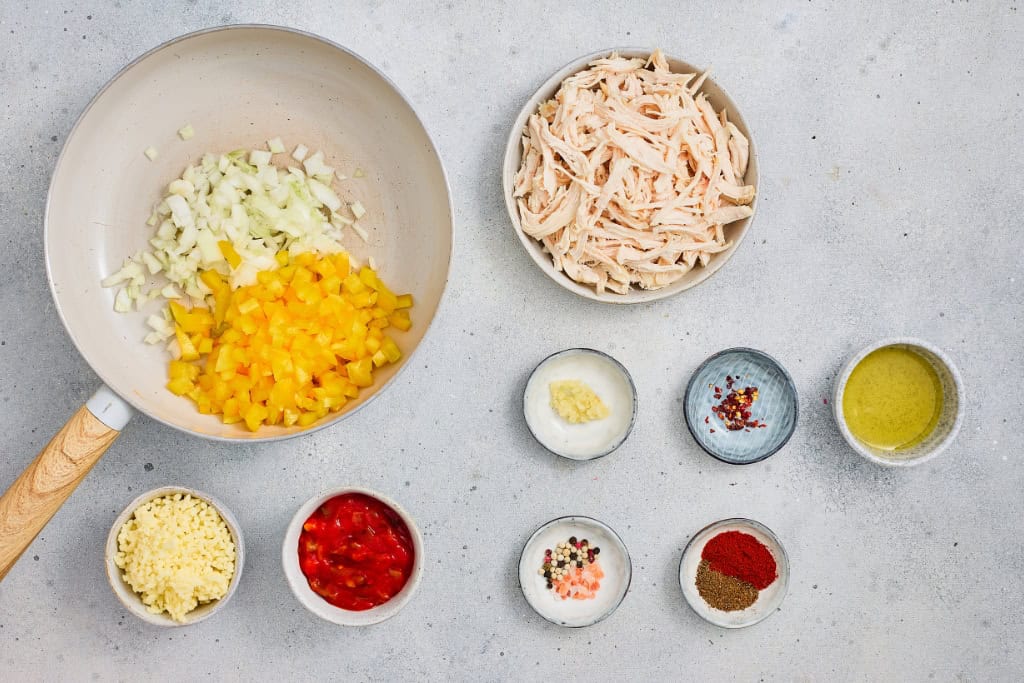
1. Prepare the Filling
Heat the vegetable oil in a skillet over medium heat. Add the chopped onion and bell pepper and cook for about 4–5 minutes, until softened and slightly sweet.
This step builds the base flavor, so don’t rush it those softened veggies make a big difference.
2. Add the Aromatics
Stir in the minced garlic and cook for about 30 seconds, just until fragrant.
You’ll start to smell everything come together here, and that’s when you know you’re on the right track.
3. Season the Chicken
Add the shredded chicken to the pan, followed by cumin, smoked paprika, chili flakes, salt, and pepper.
Give everything a good stir so the chicken is evenly coated in all those warm, smoky spices.
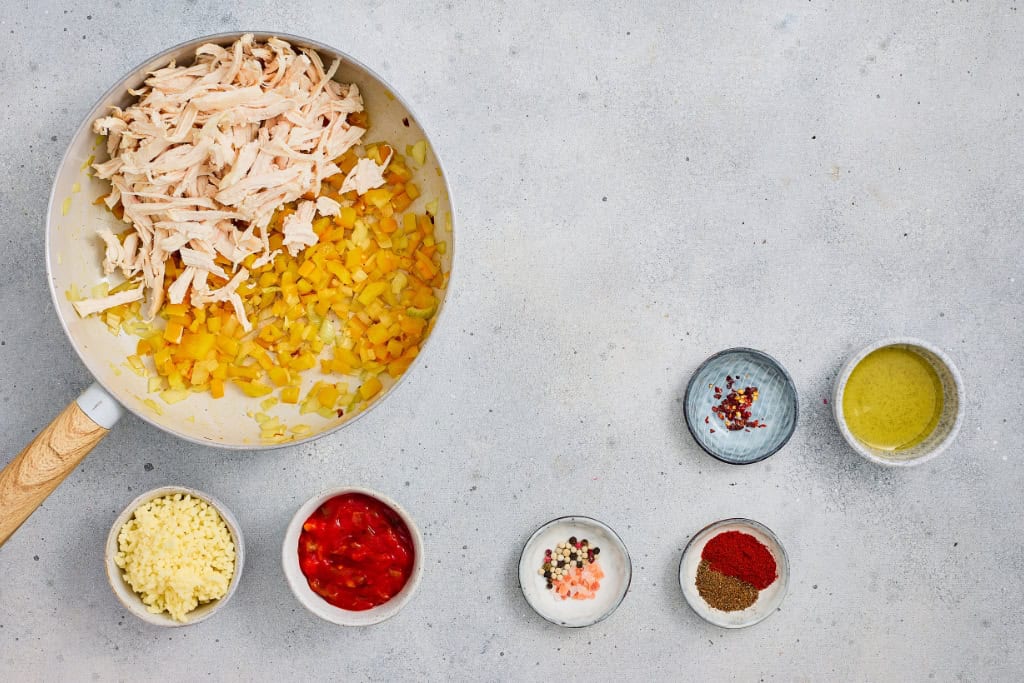
This is where the magic happens the filling starts to smell like something you’d order at your favorite restaurant.
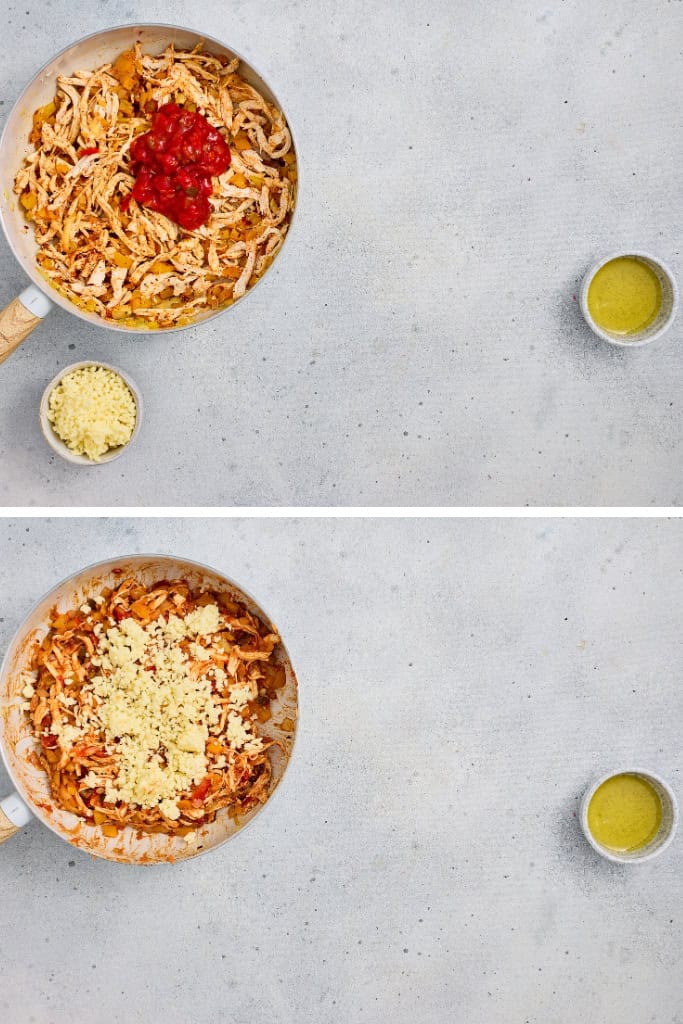
4. Thicken the Mixture
Add the salsa (or drained diced tomatoes) and cook for another 2–3 minutes.
You’re looking for the mixture to thicken slightly and for any extra moisture to cook off. You don’t want it too wet, or your chimichangas won’t crisp up properly.
Once done, remove from heat and stir in the shredded cheese until melted and gooey.
5. Assemble the Chimichangas
Warm your tortillas slightly so they’re soft and flexible (a few seconds in the microwave works perfectly).
Spoon the filling into the center of each tortilla, then:
- Fold in the sides
- Roll tightly into a burrito shape
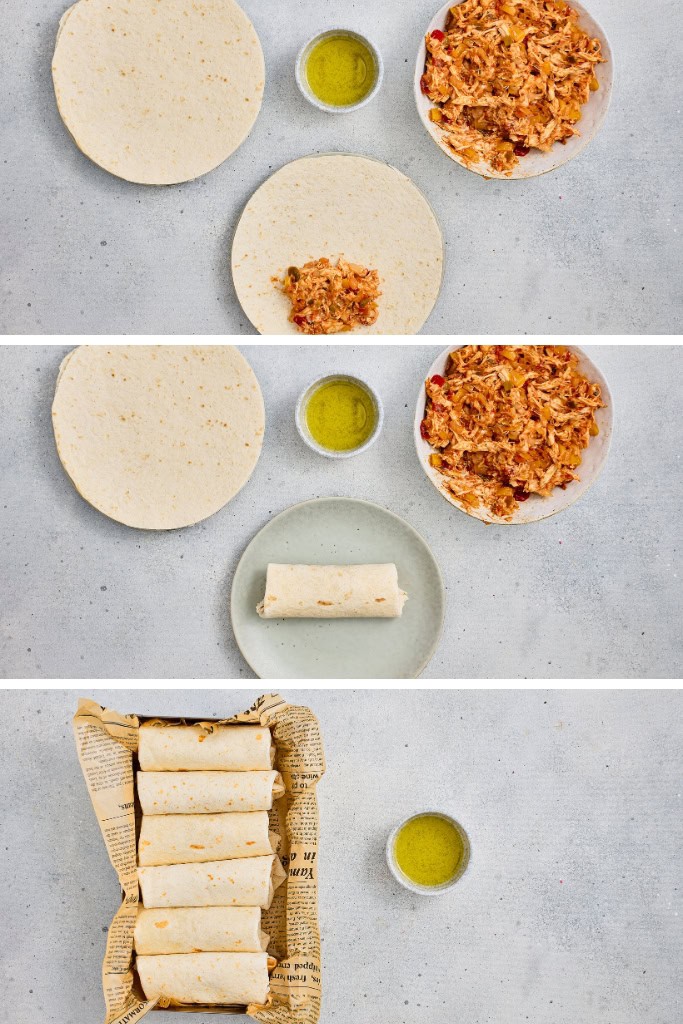
Try to keep them snug so they hold together while cooking.
Cooking Options
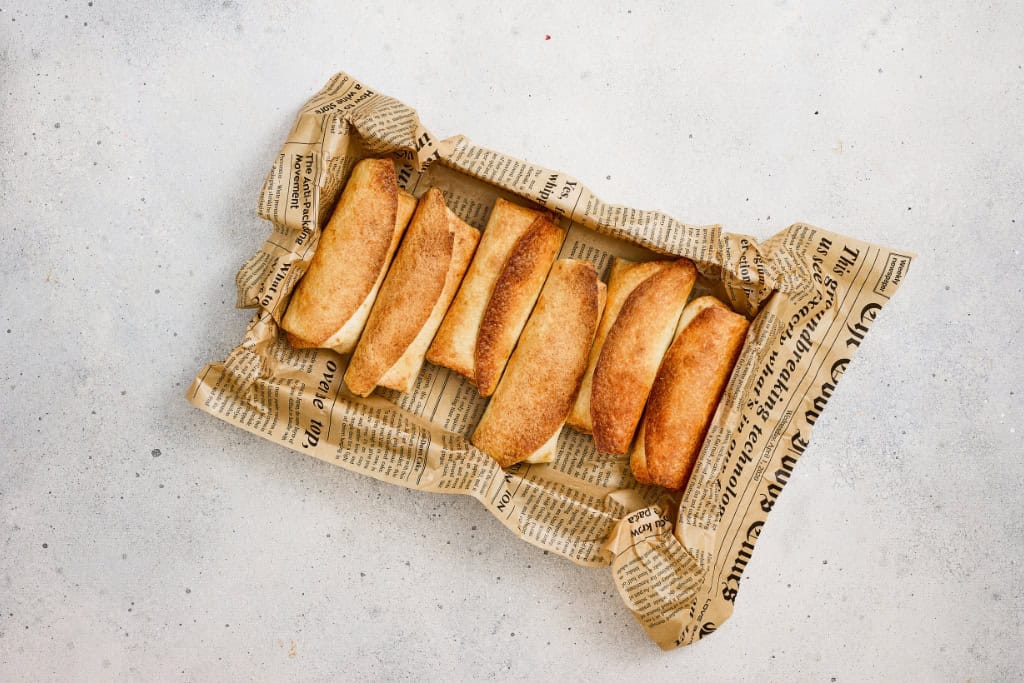
Option 1: Frying (Classic & Extra Crispy)
Heat oil in a deep skillet over medium-high heat.
Place the chimichangas seam-side down first and fry until golden, turning as needed to crisp all sides.
This method gives you that irresistible crunch the kind that makes everyone reach for seconds.
Option 2: Baking (Lighter & Still Delicious)
Preheat your oven to 220°C (425°F).
Brush each chimichanga lightly with oil and place on a baking tray.
Bake for 20–25 minutes, flipping halfway through, until golden and crisp.
It’s a little lighter but still gives you that satisfying crunch.
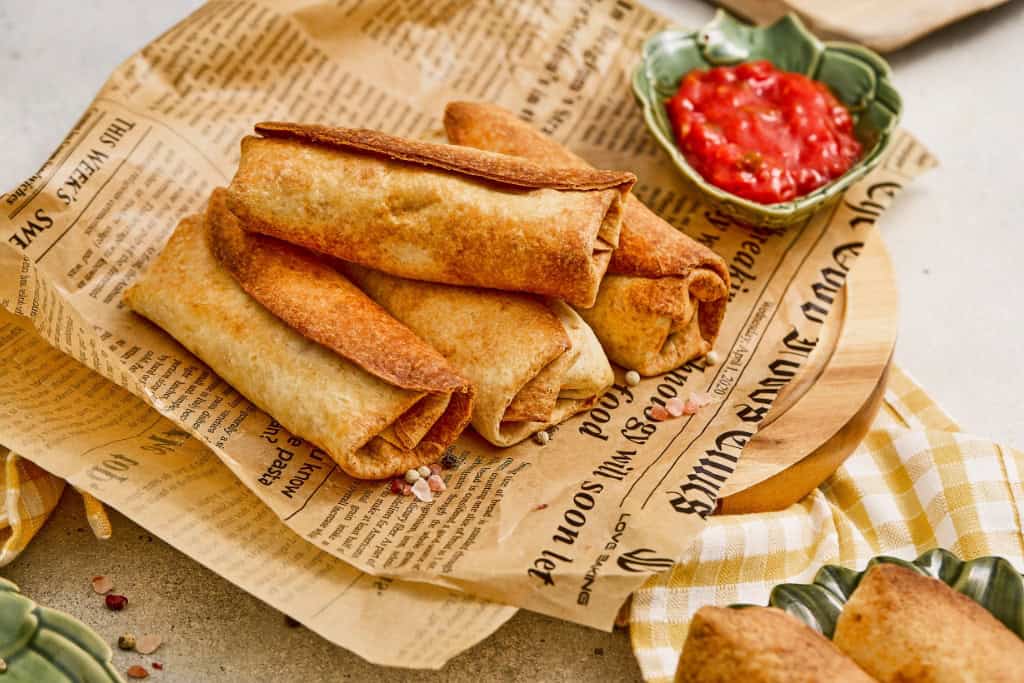
6. Serve
Let them rest for a few minutes (this helps everything set inside), then serve warm with your favorite toppings.
Topping Ideas (The Fun Part!)
This is where you can really make it your own or set up a little “topping bar” if you’re feeding a group.
Some family favorites include:
- Sour cream
- Guacamole
- Fresh chopped cilantro
- Diced tomatoes
- Shredded lettuce
- Extra cheese
- Salsa or hot sauce
If you’ve got kids, letting them choose their own toppings turns dinner into a fun little event instead of a battle.
Real-Life Tips That Make This Even Easier
After making these more times than I can count, here are a few little things that make a big difference:
Use rotisserie chicken
On busy days, this is a lifesaver. It cuts your prep time in half.
Don’t overfill
It’s tempting, but too much filling makes them harder to roll and fry.
Keep them seam-side down first
This helps “seal” them so they don’t open while cooking.
Work in batches when frying
Crowding the pan drops the oil temperature and makes them less crispy.
Make-Ahead & Storage Tips
Life gets busy, and having something ready to go in the fridge can feel like such a win.
To make ahead:
Assemble the chimichangas and store them (uncooked) in the fridge for up to 24 hours.
To freeze:
Wrap individually and freeze for up to 2 months. Cook straight from frozen just add extra time.
To reheat:
Pop them in the oven or air fryer to bring back that crispiness. The microwave works too, but they’ll be softer.
Easy Variations
One of the things I love most about this recipe is how easy it is to tweak depending on what you have.
Beef version
Swap the chicken for seasoned ground beef.
Vegetarian option
Use black beans, corn, and sautéed veggies instead.
Extra cheesy
Add a little cream cheese to the filling for a richer texture.
Spicy kick
Add jalapeños or extra chili flakes if your crew likes heat.
When to Serve Chicken Chimichangas
These fit into so many moments:
- Weeknight dinners when time is tight
- Casual weekend lunches
- Game nights with friends
- Family movie nights
- Party spreads (cut them in halves for easy sharing!)
They’re one of those meals that feel a little special without needing a ton of effort and that’s always a win.

So next time you’re wondering what to cook and you want something that feels a little fun, a little comforting, and totally doable this is a great place to start.
And don’t be surprised if they disappear faster than you expected.
View More Mexican-Inspired Recipes
- Easy Guacamole Recipe
- Mexican Elotes Street Corn
- Black Bean Rice Enchiladas
- Quesabirria Tacos
- Shrimp Tostadas
- Sheet Pan Chicken Fajita Recipe

Chicken Chimichangas
Ingredients
Chicken Filling
- 1 lb cooked chicken breast, shredded (450 g)
- 1 cup onion, finely chopped (120 g)
- 1 cup bell pepper, finely diced (120 g)
- 2 garlic cloves minced
- 1 tbsp vegetable oil
- 1½ tsp ground cumin
- 1 tsp smoked paprika
- ½ tsp chili flakes
- ½ tsp salt
- ¼ tsp freshly ground black pepper
- ½ cup salsa or canned diced tomatoes, drained
- 1 cup shredded cheese
Assembly
- 4–6 large flour tortillas 10–11 inches
- Oil for frying about 1 cup OR
- 2 tbsp oil for brushing if baking
Instructions
- Heat the vegetable oil in a skillet over medium heat. Add the chopped onion and bell pepper and cook for about 4–5 minutes, until softened and slightly sweet.This step builds the base flavor, so don’t rush it those softened veggies make a big difference.
- Stir in the minced garlic and cook for about 30 seconds, just until fragrant.You’ll start to smell everything come together here, and that’s when you know you’re on the right track.
- Add the shredded chicken to the pan, followed by cumin, smoked paprika, chili flakes, salt, and pepper.
- Give everything a good stir so the chicken is evenly coated in all those warm, smoky spices.This is where the magic happens the filling starts to smell like something you’d order at your favorite restaurant.
- Add the salsa (or drained diced tomatoes) and cook for another 2–3 minutes.You’re looking for the mixture to thicken slightly and for any extra moisture to cook off. You don’t want it too wet, or your chimichangas won’t crisp up properly.
- Once done, remove from heat and stir in the shredded cheese until melted and gooey.
- Warm your tortillas slightly so they’re soft and flexible (a few seconds in the microwave works perfectly).
- Spoon the filling into the center of each tortilla, then: Fold in the sides, roll tightly into a burrito shape
- Try to keep them snug so they hold together while cooking.