White Chocolate Oreos
When it comes to party snacks, there are a few treats that seem to steal the show every time, cookies, chocolate, and anything that’s easy to make but looks impressive. Enter these White Chocolate Oreos!

They are simple, fun, and oh-so-delicious. Perfect for any gathering, from birthdays to holiday parties, or just when you need a sweet bite to brighten your day.
Now, I know what you might be thinking: “White chocolate and Oreos? That’s it?!” Yes, that’s right! Sometimes, the best treats are the simplest ones. The combination of rich, creamy white chocolate and the classic crunch of an Oreo cookie is absolutely irresistible. And the best part? They’re easy to make. Trust me, once you try these, you’ll want to make them for every occasion.
Why White Chocolate Oreos Are the Perfect Party Snack
First off, I can’t tell you how many times I’ve whipped up these Oreo treats for family celebrations, game nights, or just for a little sweet treat after dinner. They’re quick to make, which is always a win in my book.
They’re also endlessly customizable! While the recipe I’m sharing is delicious as-is, you can switch up the sprinkles, use different chocolate (milk or dark, anyone?), or even dip them in crushed nuts or candy pieces for a little extra flair.
Another reason these are a go-to in my snack arsenal is how versatile they are. You can make them ahead of time, so they’re perfect for busy party prep. Plus, they keep well in the fridge, so you can make a batch and store them until you need them.

How to Make These Oreo Treats
The ingredients are straightforward, and there’s little to no baking involved—just a bit of melting, dipping, and sprinkling!
Ingredients

Prepare the Chocolate
Start by placing the white chocolate chips in a microwave-safe bowl. You’ll want to melt the chocolate in intervals to ensure it doesn’t burn. Microwave it in 30-second bursts, stirring in between each round until the chocolate is fully melted and smooth. You can also melt it in a double boiler if you prefer, but the microwave method is quick and easy.
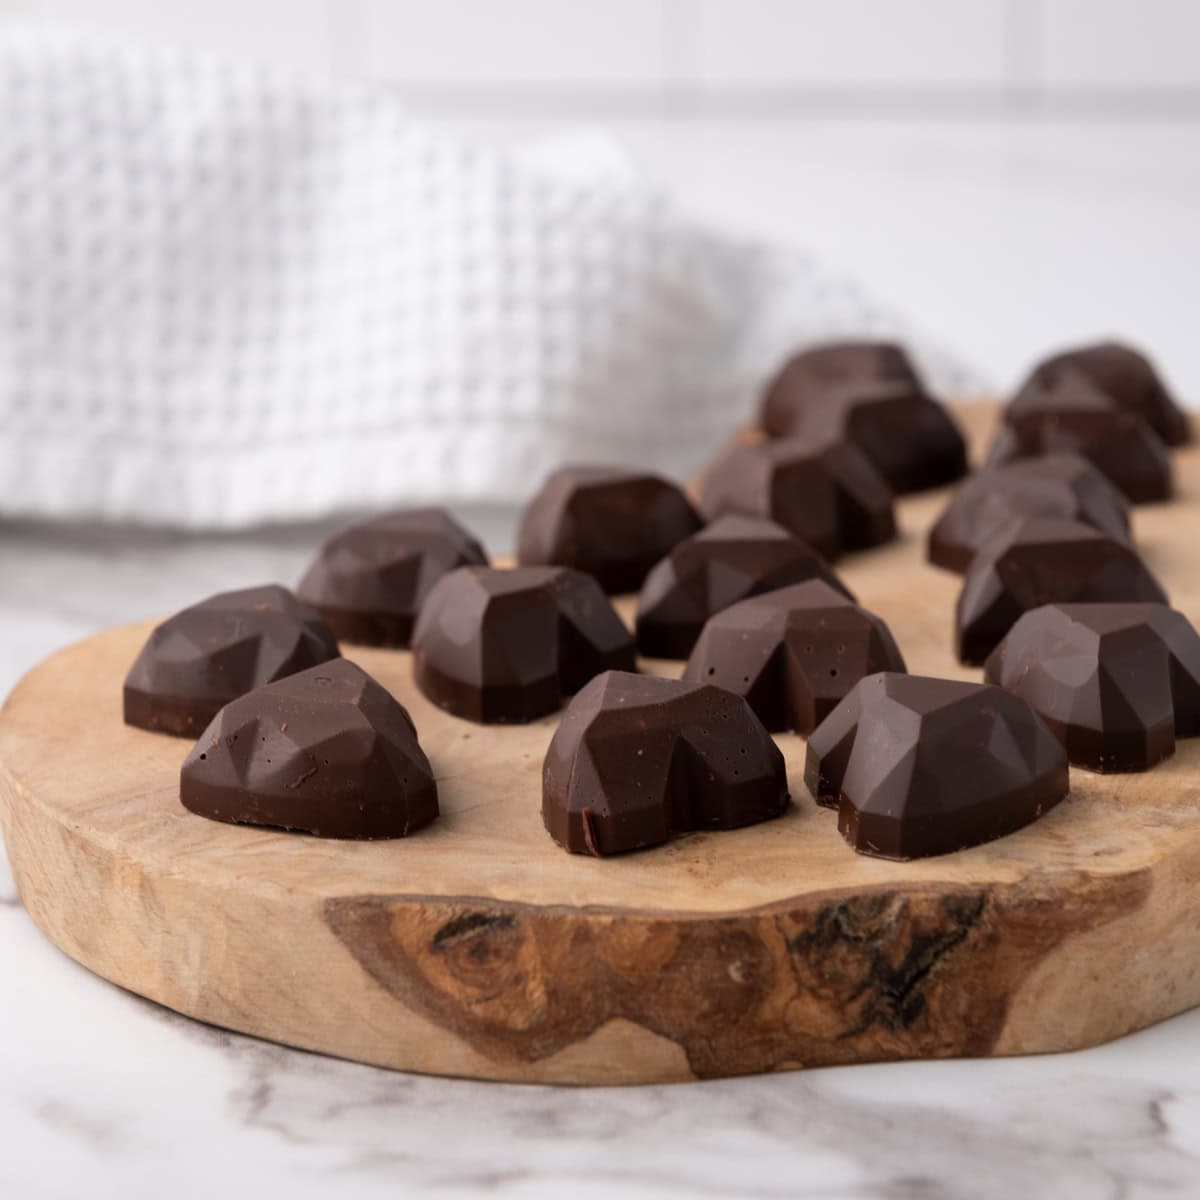
Mold the Chocolate
Grab your Oreo mold (or, if you don’t have one, a silicone tray will do just fine!). Scoop a spoonful of the melted chocolate and drop it into the bottom of the mold, spreading it around to cover the surface evenly. This will form the base layer for your Oreos.
Add the Oreos
Take an Oreo and gently press it into the melted chocolate, so it’s sitting in the mold with a layer of chocolate beneath it. This is where the magic happens, this is the base that holds everything together, and it’s going to create that amazing chocolatey bite when you take a nibble.
Cover with More Chocolate
Once your Oreos are nestled in the mold, it’s time to add another scoop of melted white chocolate on top of each Oreo. You’ll want to cover them completely so the chocolate sets perfectly around the cookie. Shake the mold gently to help the chocolate settle evenly around the Oreos.
Add Sprinkles
While the chocolate is still soft, sprinkle your choice of sprinkles over the top. This is where you can really get creative! Whether you’re using rainbow sprinkles, festive holiday shapes, or even gold glitter for a little sparkle, the sprinkles add that extra touch of fun.

Chill
Once you’ve added your sprinkles, place the mold in the fridge and let the chocolate harden. It should take about an hour for the chocolate to set completely. If you’re in a rush, you can pop them in the freezer for a quicker chill (about 30 minutes should do the trick).

Enjoy!
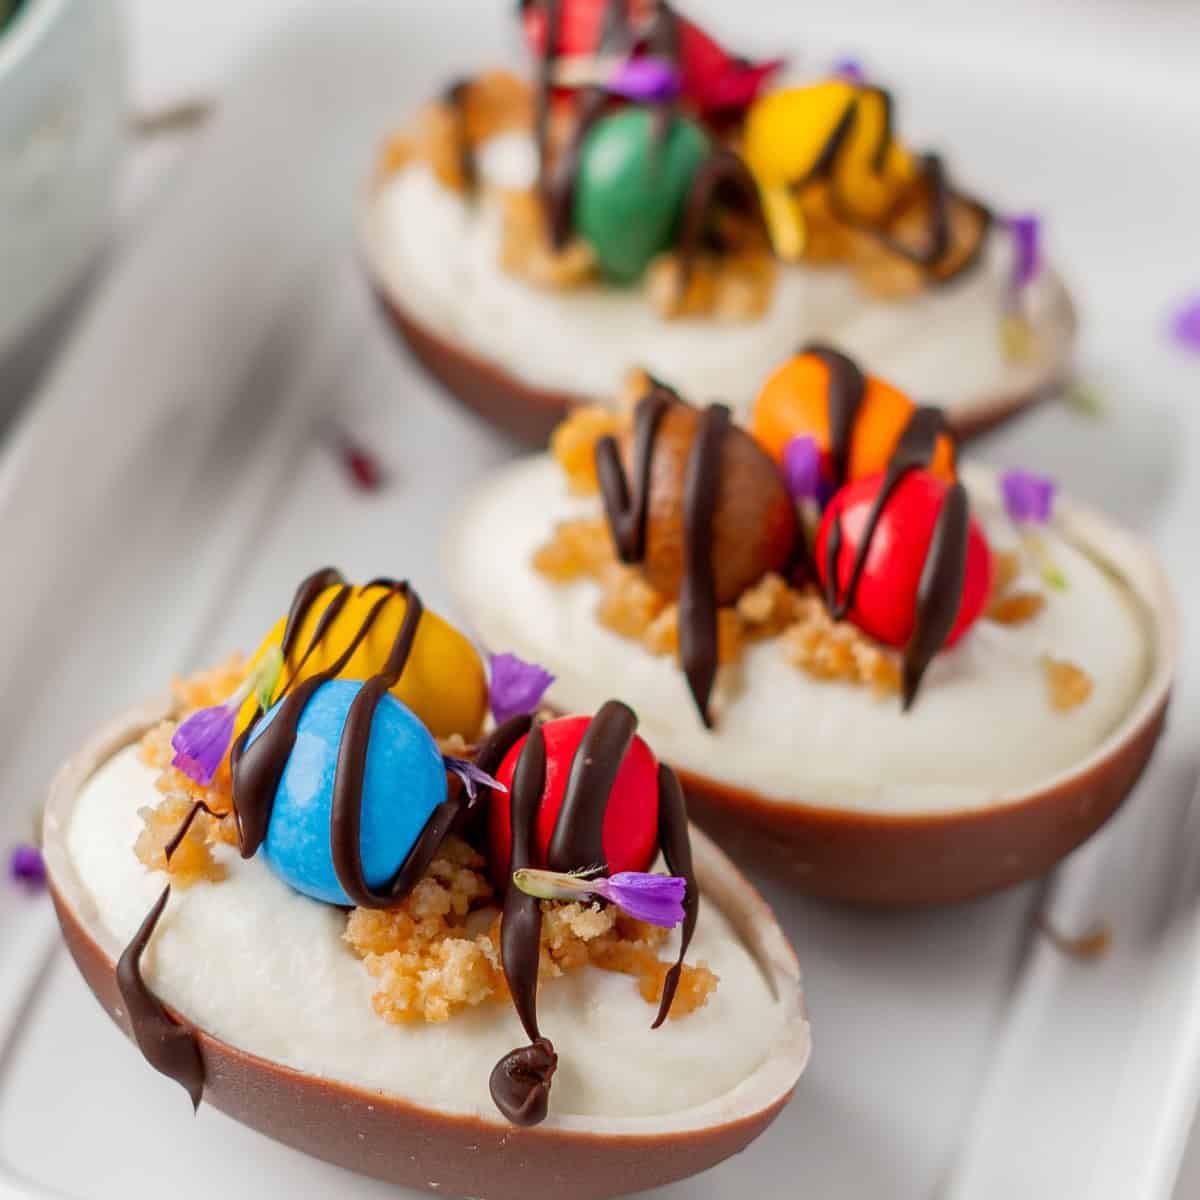
Once the chocolate has hardened, carefully remove your White Chocolate Oreos from the mold. They’ll be all set and ready to enjoy! Whether you’re serving them at a party, enjoying a snack, or packing them up as a sweet gift for someone special, they’re sure to be a hit.
A Few Tips for Success
- Use High-Quality White Chocolate: Since white chocolate is the star of this treat, it’s worth using a good-quality product. It’ll melt better and have a smoother texture, giving your Oreos that perfect creamy finish.
- Don’t Overheat the Chocolate: When melting your white chocolate, be patient and stir it frequently. Overheating can cause it to seize up, so make sure to microwave it in short intervals to keep it smooth.
- Get Creative with Add-Ins: If you’re looking for something a little different, feel free to add crushed cookies, nuts, or even colorful candies into the melted chocolate before it sets. Just keep in mind that adding too much can make the chocolate layer uneven, so a little goes a long way.
- Store in an Airtight Container: These White Chocolate Oreos are best enjoyed fresh, but they can be stored in an airtight container in the fridge for up to a week. Just be sure to keep them in a single layer to avoid the chocolate getting scratched or messy.
- Make It a Family Activity: These are so much fun to make with kids! Let them help with melting the chocolate, adding the sprinkles, or pressing the Oreos into the molds. It’s a great way to get everyone involved in the kitchen and bond over a tasty treat.

Perfect for Every Party
Whether you’re planning a birthday, a baby shower, or a casual get-together, these cookies will be the talk of the party.
So, gather your ingredients, get your molds ready, and let’s get to making some White Chocolate Oreos that will have everyone asking for the recipe.
Check Out More Oreo Recipes
White Chocolate Oreos
Ingredients
- 8 Oreos or more, depending on how many you want to make!
- 8 oz white chocolate chips or more if you’re making a bigger batch
- 2 tbsp sprinkles any kind you like, think colorful, fun, and festive!
Instructions
- Start by placing the white chocolate chips in a microwave-safe bowl. You’ll want to melt the chocolate in intervals to ensure it doesn’t burn. Microwave it in 30-second bursts, stirring in between each round until the chocolate is fully melted and smooth. You can also melt it in a double boiler if you prefer, but the microwave method is quick and easy.
- Grab your Oreo mold (or, if you don’t have one, a silicone tray will do just fine!). Scoop a spoonful of the melted chocolate and drop it into the bottom of the mold, spreading it around to cover the surface evenly. This will form the base layer for your Oreos.
- Take an Oreo and gently press it into the melted chocolate, so it’s sitting in the mold with a layer of chocolate beneath it. This is where the magic happens, this is the base that holds everything together, and it’s going to create that amazing chocolatey bite when you take a nibble.
- Once your Oreos are nestled in the mold, it’s time to add another scoop of melted white chocolate on top of each Oreo. You’ll want to cover them completely so the chocolate sets perfectly around the cookie. Shake the mold gently to help the chocolate settle evenly around the Oreos.
- While the chocolate is still soft, sprinkle your choice of sprinkles over the top. This is where you can really get creative! Whether you’re using rainbow sprinkles, festive holiday shapes, or even gold glitter for a little sparkle, the sprinkles add that extra touch of fun.
- Once you’ve added your sprinkles, place the mold in the fridge and let the chocolate harden. It should take about an hour for the chocolate to set completely. If you’re in a rush, you can pop them in the freezer for a quicker chill (about 30 minutes should do the trick).
- Once the chocolate has hardened, carefully remove your White Chocolate Oreos from the mold. They’ll be all set and ready to enjoy! Whether you’re serving them at a party, enjoying a snack, or packing them up as a sweet gift for someone special, they’re sure to be a hit.