Cream Cheese Cherry Danish Pastries
Let’s talk pastries. Not the kind you buy and pretend you made, but the kind that actually looks fancy and tastes like you spent all afternoon baking… even though you whipped them up while waiting for your coffee to brew.
These Danish Pastries with Cream Cheese & Cherries are my go-to when I need something quick, easy, and a little bit special. Whether you’re hosting brunch, bringing a treat to a get-together, or just want to make a regular day feel fancy, these babies hit the sweet spot.

Danish Pastries with Cream Cheese & Cherries
- Minimal ingredients – We’re talking seven, and you probably have most of them already.
- No fancy tools – Just a bowl, a spoon, a baking sheet, and your two lovely hands.
- Freezer-friendly puff pastry – Aka, the magic sheet that turns into golden flaky goodness.
- Kid-approved AND adult-adored – A rare unicorn in the snack world.
- It looks impressive – You’ll feel like you belong on one of those baking shows…without the stress-sweat.
Here’s What You’ll Need
Step-by-Step:
1. Preheat the Oven
Set it to 375°F (190°C) and line your baking sheet with parchment paper. This step makes cleanup a breeze, and trust me, you’ll appreciate that later when you’re eating your pastry in peace instead of scrubbing pans.
2. Mix the Filling
In a small bowl, stir together the cream cheese, sugar, and vanilla until it’s smooth and creamy. You want it spreadable, dreamy, and something you could totally eat by the spoonful (but don’t… yet).
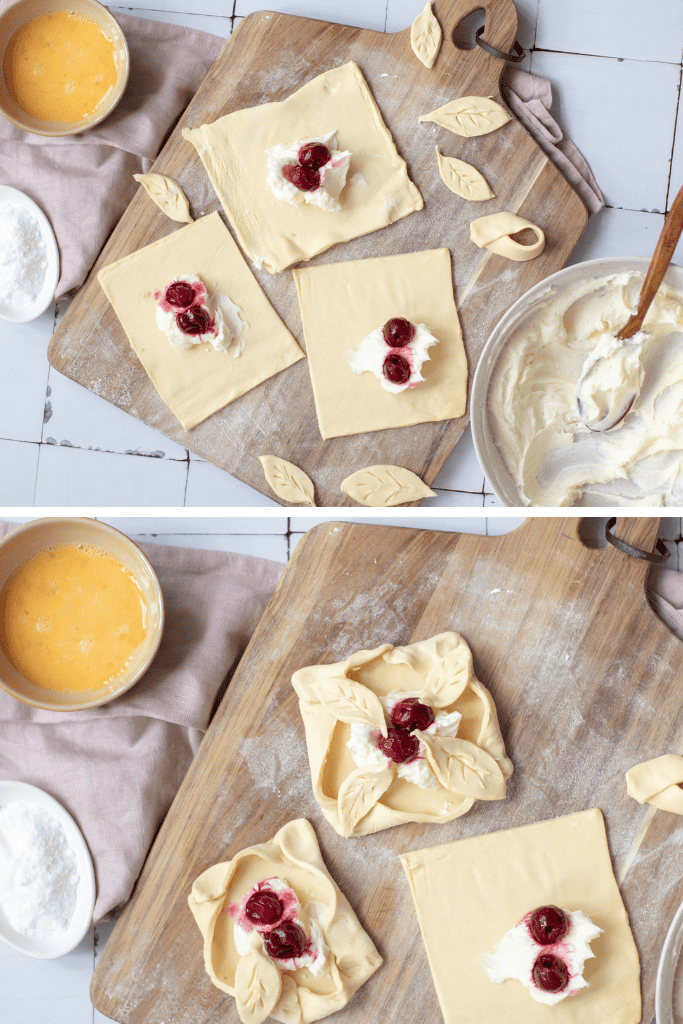
3. Prep the Puff Pastry
Unroll that thawed puff pastry onto a lightly floured surface and give it a little roll to smooth out the creases. Then, cut it into 8 equal squares. I usually do this with a pizza cutter. Then if you are feeling fancy you can cut out some leaf shapes.

4. Assemble the Pastries
Scoop a spoonful of your cream cheese mixture right into the center of each square. Don’t worry about making it perfect.
Next, add a few cherries on top. Not too many, just enough to look juicy and taste amazing.
Now fold the corners towards the center. You can go full pinwheel, diamond shape, or just do a casual overlap. Add your leaves if using them. This part’s forgiving, I promise. Gently press the tips to seal them a little.
5. Egg Wash Magic
Brush the edges with the beaten egg. This helps them bake up shiny and gorgeous.
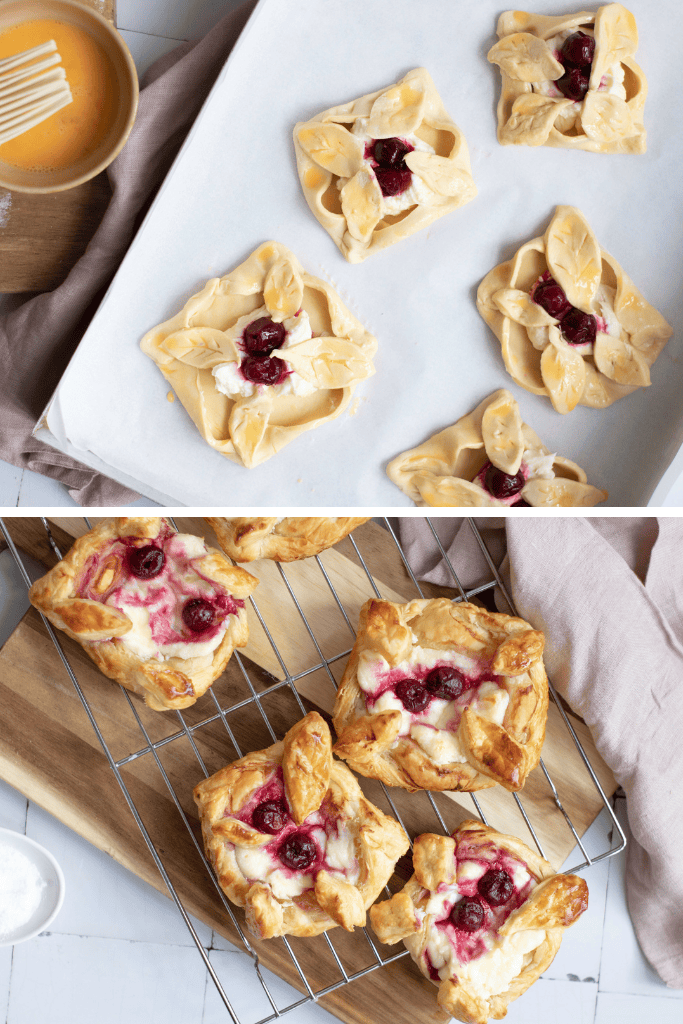
6. Bake and Breathe
Pop them in the oven and bake for 18–20 minutes, or until they’re puffed and golden brown. Your kitchen will smell ridiculously good.
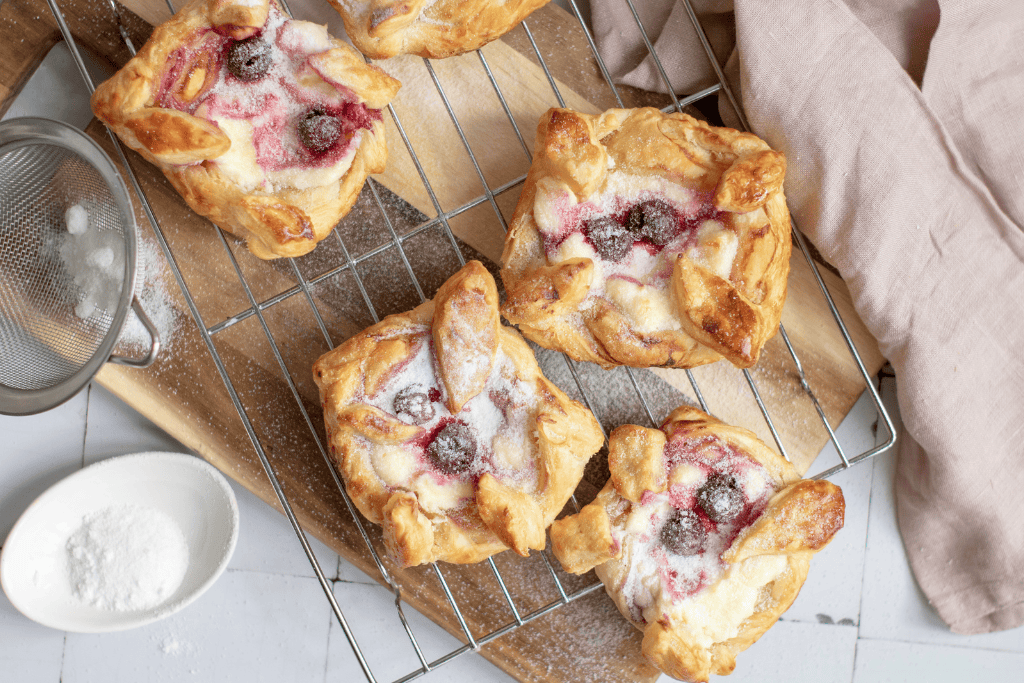
7. Finishing Touch
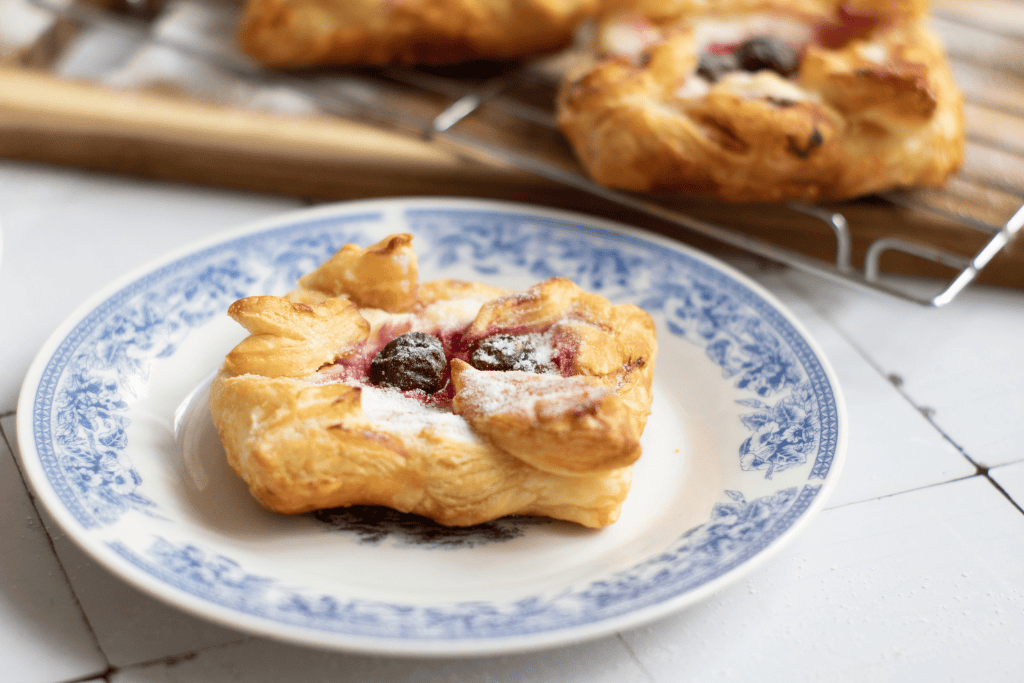
Let them cool for about 5 minutes, then dust with a bit of powdered sugar. That final flourish? So worth it. It makes them look like they came straight from a bakery.
Serve It Up
These Danish pastries are perfect warm, fresh from the oven, but they’re just as good cooled down a bit. You can serve them for:
- Weekend brunches
- Book club treats
- Potlucks
- Tea parties with the kids
- That moment when you just want something sweet that doesn’t come from a box
They’re also super easy to pack up and take on the go. I’ve brought them to school bake sales, playdates, and even a family road trip.
Can You Make Them Ahead?
Totally. You can prep everything the night before, assemble them, cover with plastic wrap, and pop them in the fridge. In the morning, just brush with egg and bake. Boom. Fresh, homemade pastries before 9am.
Storage Tips
If you have leftovers, just store them in an airtight container in the fridge. You can warm them up for 10 seconds in the microwave or a few minutes in a low oven to bring back the flakiness.
They also freeze well, just reheat straight from frozen in the oven at 350°F until warmed through.