Garlic Swirl Bread
If there’s one thing I’ve learned over the years, it’s that when garlic and bread come together, good things happen. Really good things. Garlic bread is one of those timeless, comforting foods that feels right at any occasion family dinners, game nights, holiday feasts, or even just a random Tuesday when you need a little carb-loaded happiness.
But today, I want to share with you a version that’s just a little extra special: Garlic Swirl Bread.
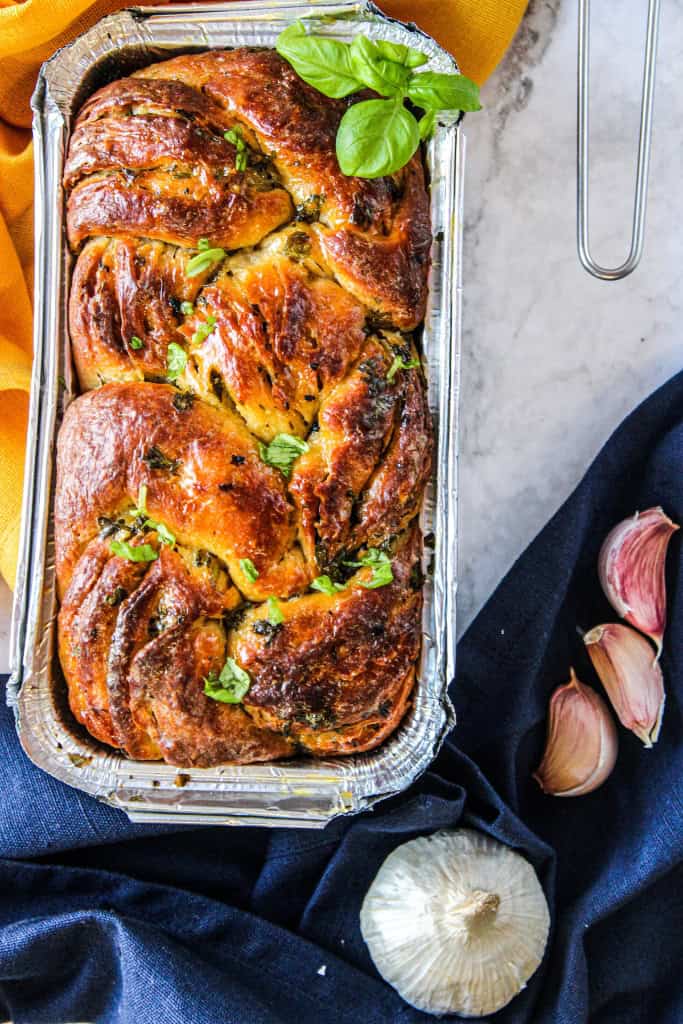
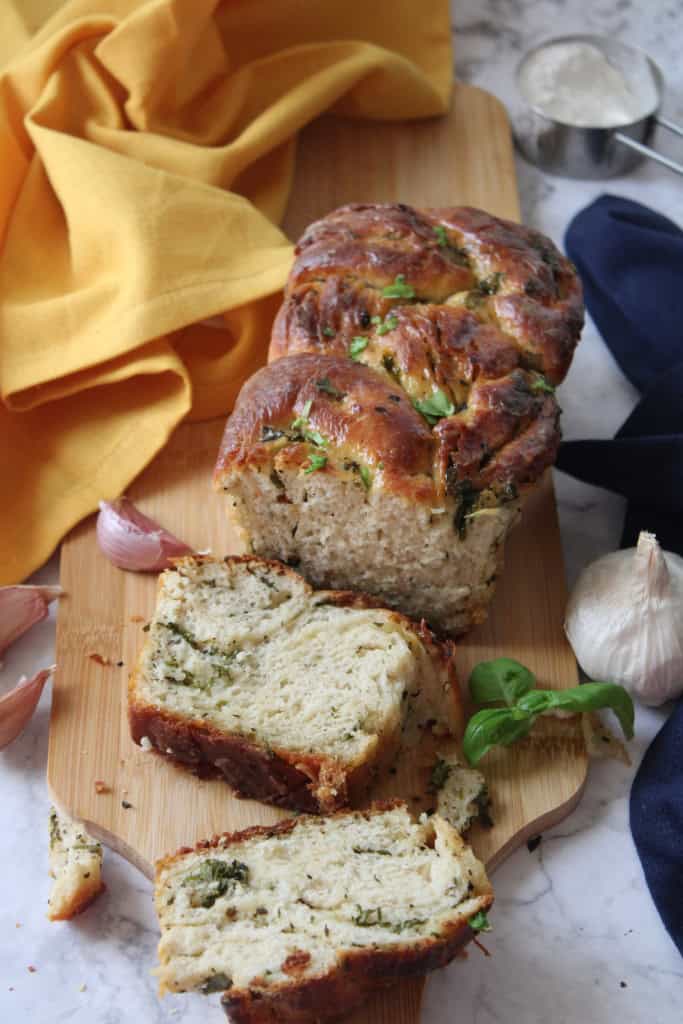
Instead of just tossing garlic butter on top of plain bread, this recipe takes it up a notch by rolling that buttery, garlicky goodness right into the dough itself. Picture a loaf that’s soft and fluffy on the inside, with beautiful buttery garlic swirls throughout. Every slice feels like it was brushed with garlic butter already because, well, it basically was!
The best part? It looks like you spent hours fussing over it, but it’s surprisingly simple. I promise, even if you’ve never baked bread from scratch before, you’ll be able to pull this one off.
Why Garlic Swirl Bread Is Worth Making
If your family is anything like mine, bread doesn’t last long on the table. No matter what I serve pasta, soup, roast chicken someone always says, “Is there bread?” And when there’s garlic bread, forget about it. The loaf disappears before I can even sit down.
This swirl bread has a few things going for it that make it perfect for families and gatherings:
- It’s beautiful. The braided swirl design looks bakery-worthy, but it’s basically just rolling and twisting the dough. Easy, but impressive.
- It’s full of flavor. Instead of buttering slices after baking, the garlic-parsley-butter mixture is baked right in.
- It feeds a crowd. A medium loaf pan will give you enough to share (though you may want to hide a slice or two for yourself).
- It’s versatile. Serve it alongside soup, pasta, or even as a party snack. I’ve even used leftovers for sandwiches the next day.
Ingredients You’ll Need
Here’s what you’ll gather to make this garlicky dream bread:
Ingredients:

Step-by-Step Directions
Let’s walk through this together. Imagine we’re in the kitchen side by side I’ve got my apron on, you’ve got your flour-dusted hands ready, and we’re chatting while we bake.
Step 1: Mix the dry ingredients.
Grab a medium bowl and mix your flour, yeast, and salt. This is your base.

Step 2: Add the buttermilk and butter.
Pour in your buttermilk and add just 1 tablespoon of the butter. Mix with a spatula until a dough ball forms. Don’t worry if it looks a little rustic at first; it’ll come together. Set it in a warm spot for about an hour until it doubles in size. (I usually pop mine near the oven while it preheats, or just cover with a towel and leave it on the counter.)

Step 3: Roll it out.
Once it’s doubled, transfer the dough onto a floured surface. Roll it into a rectangle about 16 x 10 inches. Don’t stress about perfection; close enough is good enough.
Step 4: Make the garlic butter.
Melt the rest of the butter and stir in your chopped garlic and parsley. It smells heavenly already. Spread this mixture all over your rolled dough.

Step 5: Roll and braid.
Roll the dough into a log, then slice it in half lengthwise. Take the two halves, twist them together like a braid, and coil them into your loaf pan (like a snake curling around). It looks fancy, but it’s really just rolling and twisting.
Step 6: Bake.
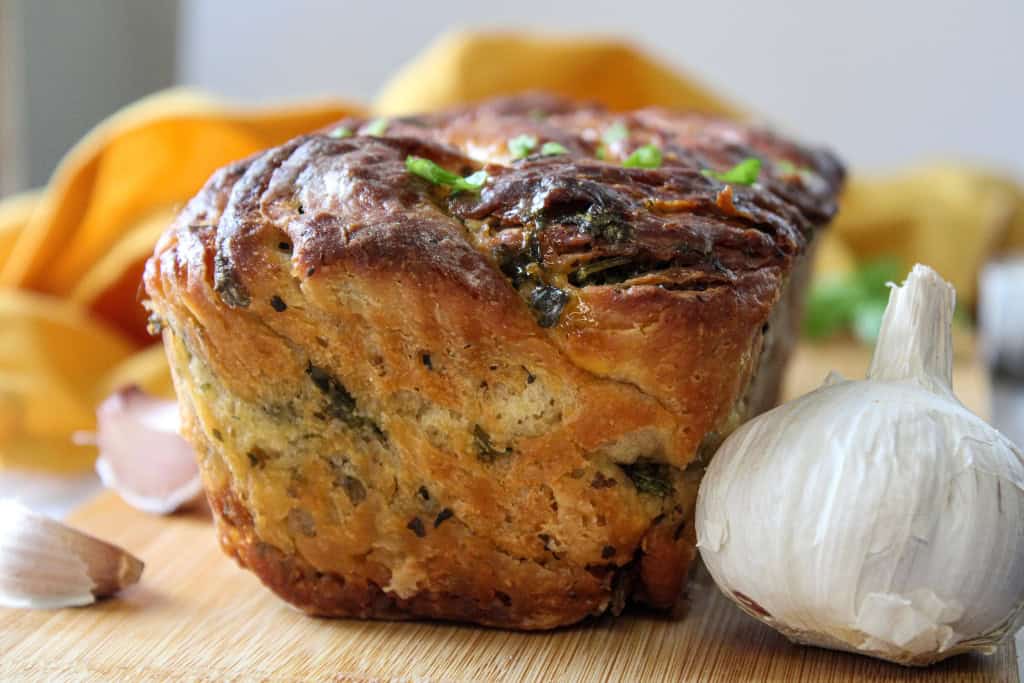
Pop it in a 350°F oven for about 35 minutes. The top should be golden, and your house will smell so good that everyone will be hovering in the kitchen waiting for it to come out.
Tips for Success
- Use fresh garlic if you can. It gives the bread that bold, delicious flavor you just don’t get from powder.
- Don’t skip the resting time. That one hour of rising makes a huge difference in texture.
- Line your loaf pan. Parchment paper makes it so much easier to lift out.
- Let it cool (just a bit). I know it’s hard, but give it 10 minutes before slicing so the swirls stay neat.
How to Serve Garlic Swirl Bread
Now here’s the fun part eating it! This bread goes with so many meals, but here are some family favorites:
- With soup: Tomato, pumpkin, or chicken noodle this bread is perfect for dipping.
- With pasta: Spaghetti night instantly feels like a feast.
- At parties: Slice it into thick chunks and serve with a dip (spinach dip, marinara, or even cheese fondue).
- For sandwiches: Slice horizontally and fill with grilled chicken, mozzarella, and fresh veggies.
- As a snack: Honestly, a slice with a little extra butter is all I need.
Family Moments Around Bread
Food has a way of weaving into our memories, doesn’t it? I can still picture my kids coming into the kitchen while this bread bakes, noses in the air, asking, “Is it ready yet?” And my husband, who usually claims he’s “cutting back on carbs,” somehow manages three slices without blinking.
That’s the thing about bread it’s more than just food. It’s comfort. It’s a centerpiece on the table that brings people together. And when it’s warm, garlicky, and homemade, it feels like love baked right in.

Variations to Try
Once you’ve made the classic version, play around with some twists (pun intended):
- Cheesy Garlic Swirl Bread: Add shredded mozzarella or cheddar with the garlic butter.
- Herb Swirl Bread: Try basil, oregano, or rosemary instead of parsley.
- Spicy Garlic Bread: Add red pepper flakes to the butter mixture for a little kick.
- Sweet Swirl Bread: Swap the garlic butter for cinnamon sugar butter and turn it into dessert.
Storage & Leftovers
- Room temp: Wrap tightly in foil and it’ll stay soft for 2–3 days.
- Freezer: Slice, wrap in plastic, then foil, and freeze for up to 2 months. Reheat in the oven for best results.
- Leftover magic: Toast slices and top with avocado and eggs for a breakfast twist.
If you’ve ever wanted to try baking bread but felt intimidated, this Garlic Swirl Bread is the one to start with. It’s easy, forgiving, and oh-so rewarding. The smell alone will make your kitchen feel like a bakery, and once you slice into it and see those gorgeous buttery swirls, you’ll understand why this recipe is a keeper.
So next time you’re planning a family meal or a get-together, give this bread a try. Trust me, people will ask for the recipe and you’ll smile knowing how simple it really was.
Because at the end of the day, it’s not just bread. It’s those little moments gathered around the table, sharing food and laughter, that make it truly special.
Check Out More Bread Recipes
Garlic Swirl Bread
Ingredients
- 2 cups self-rising flour saves you a step since it already has leavening.
- 1 cup buttermilk keeps the bread tender and adds a lovely flavor.
- 1 tbsp dry yeast for that classic bread rise.
- 3 cloves garlic fresh is best but pre-minced works in a pinch.
- 8 tbsp butter because garlic bread without butter is just bread.
- ½ tbsp salt balances and enhances flavor.
- 6 tbsp fresh or dried parsley adds freshness, color, and a hint of herby taste.
Instructions
- Grab a medium bowl and mix your flour, yeast, and salt. This is your base.
- Pour in your buttermilk and add just 1 tablespoon of the butter. Mix with a spatula until a dough ball forms. Don’t worry if it looks a little rustic at first; it’ll come together. Set it in a warm spot for about an hour until it doubles in size. (I usually pop mine near the oven while it preheats, or just cover with a towel and leave it on the counter.)
- Once it’s doubled, transfer the dough onto a floured surface. Roll it into a rectangle about 16 x 10 inches. Don’t stress about perfection; close enough is good enough.
- Melt the rest of the butter and stir in your chopped garlic and parsley. It smells heavenly already. Spread this mixture all over your rolled dough.
- Roll the dough into a log, then slice it in half lengthwise. Take the two halves, twist them together like a braid, and coil them into your loaf pan (like a snake curling around). It looks fancy, but it’s really just rolling and twisting.
- Pop it in a 350°F oven for about 35 minutes. The top should be golden, and your house will smell so good that everyone will be hovering in the kitchen waiting for it to come out.