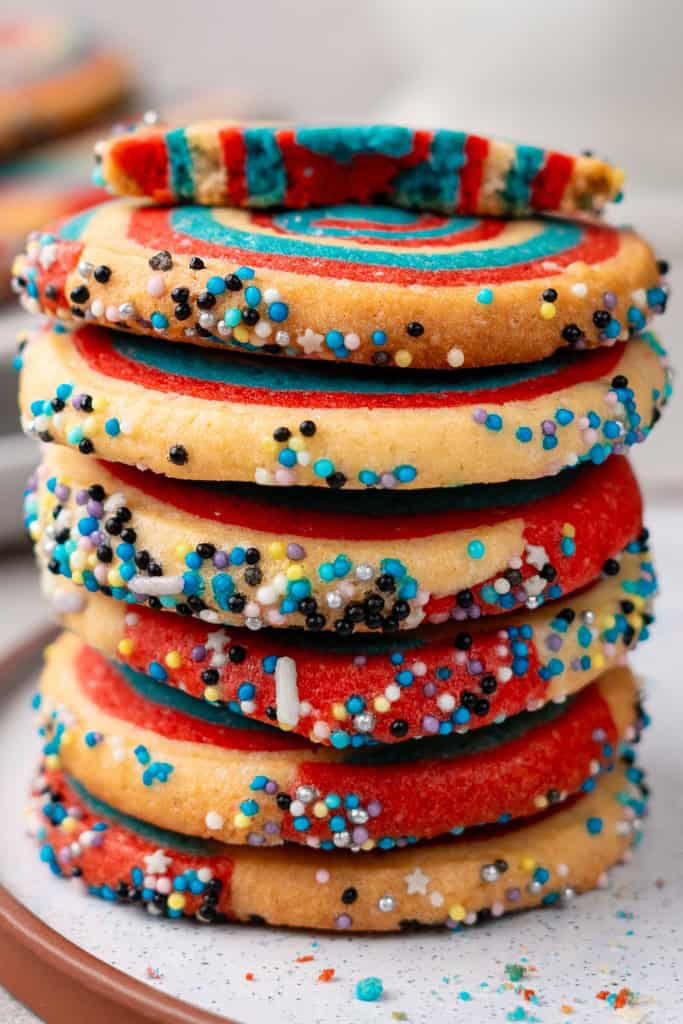
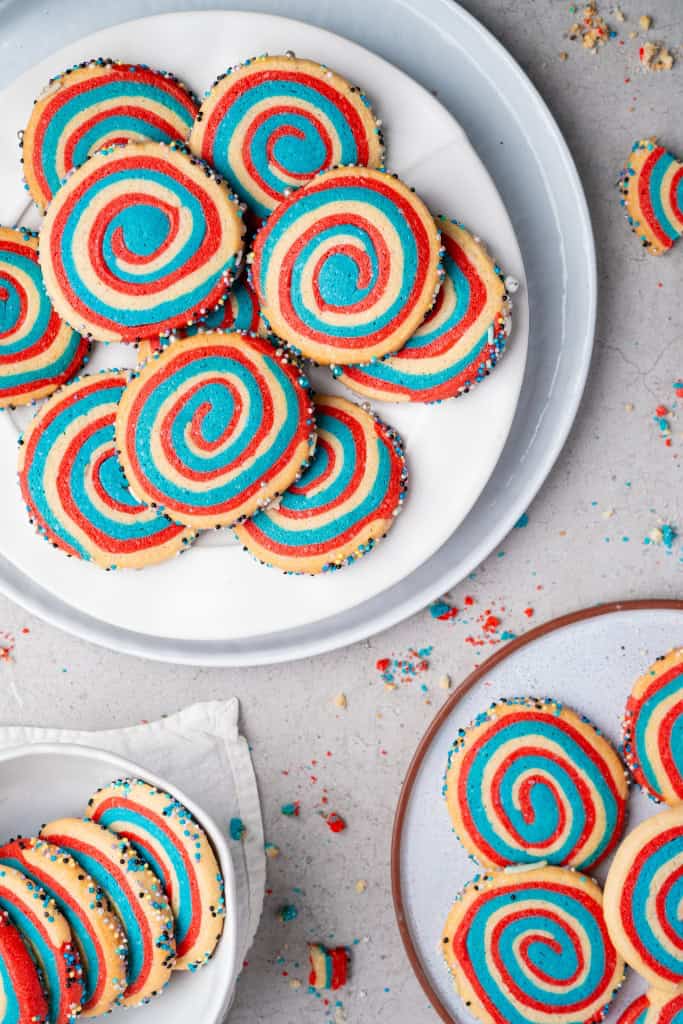
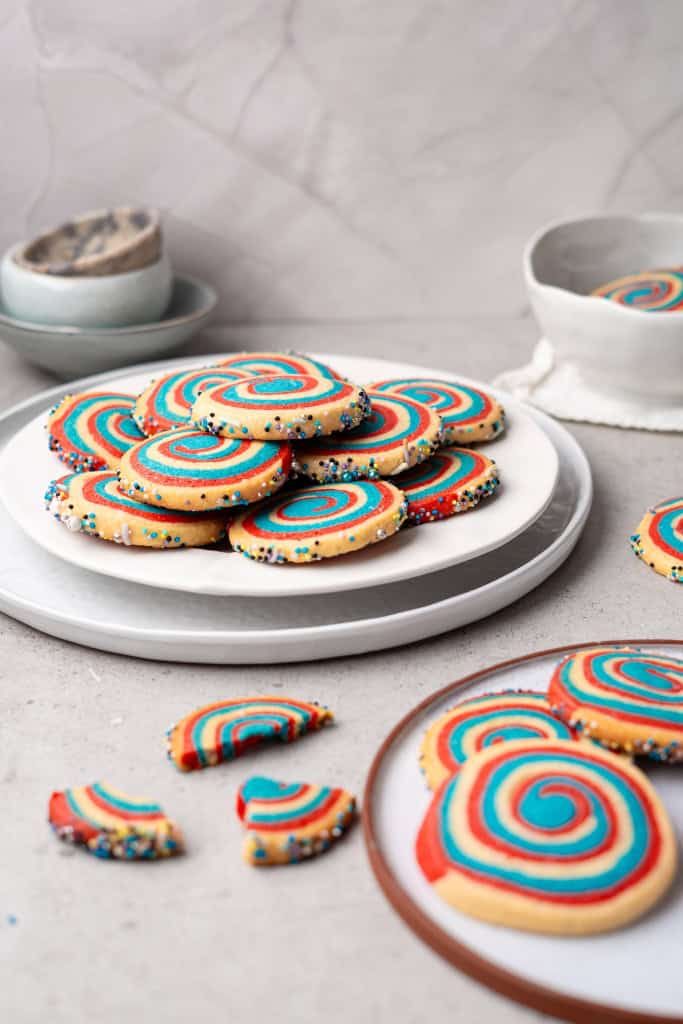
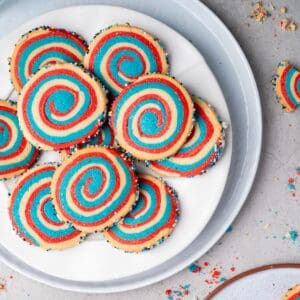
Patriotic Pinwheel Cookies
These Patriotic Pinwheel Cookies are perfect for a 4th of July celebration, memorial day or just anytime you want a festive treat.
Easy to make with only a few ingredients, you can whip up a batch of these cookies in no time.
Why You’ll Love These Patriotic Pinwheel Cookies
Before we get into the how, let’s talk about the why.
- They’re eye-catching and festive
- The dough is easy to work with
- You can make them ahead of time
- Kids love helping with the colors
- They taste like a soft, buttery sugar cookie (always a win)
And here’s a little secret: once you master the rolling technique, you can use this same base for so many other color combinations throughout the year.
Patriotic Pinwheel Cookies Recipe
Servings: Makes about 30–36 cookies
Prep Time: 30 minutes
Chill Time: 2½ hours
Cook Time: 8–10 minutes
Total Time: About 3½ hours (including chilling)
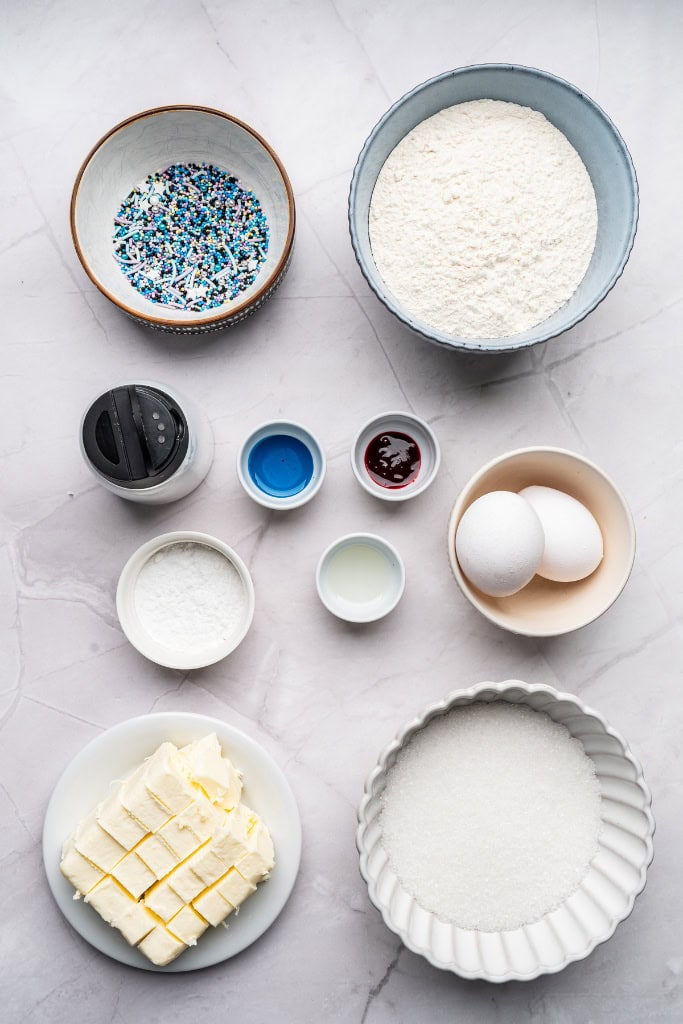
Ingredients:
Dry Ingredients
Wet Ingredients
Coloring & Finishing
Step 1: Make the Base Dough
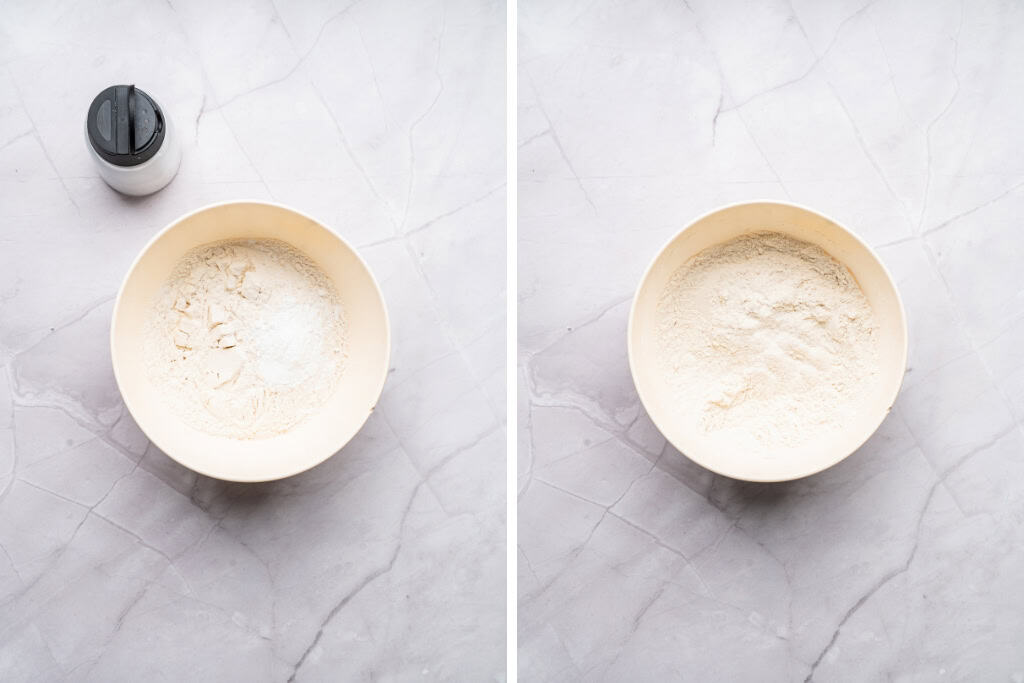
In a medium bowl, whisk together the flour, baking powder, and salt. Set it aside.
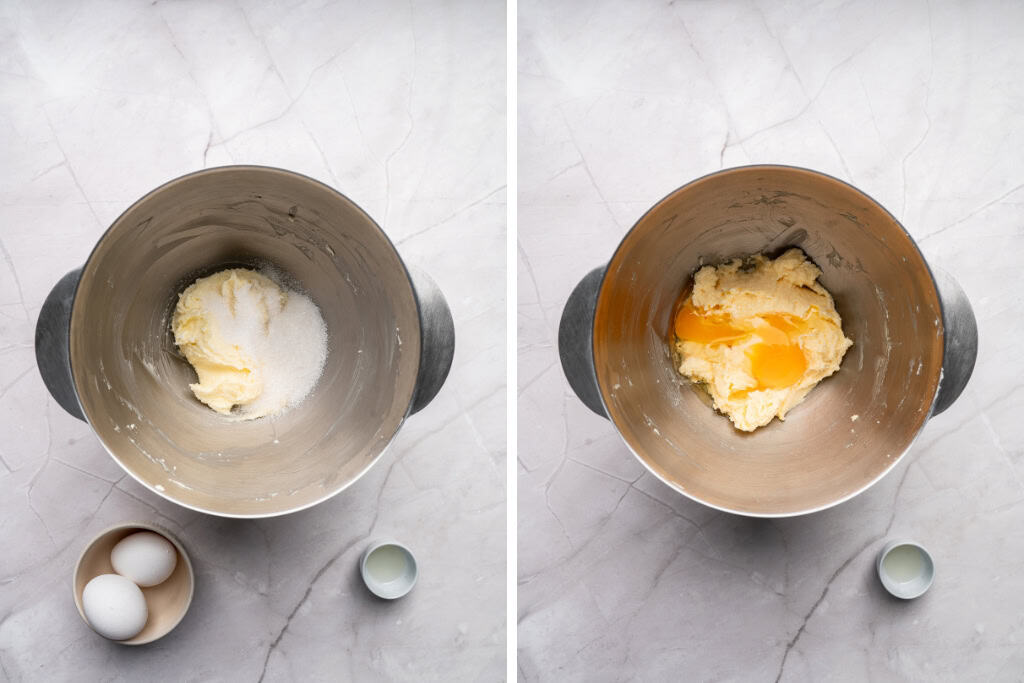
In a stand mixer fitted with the paddle attachment (or using a hand mixer), beat the butter on medium speed until smooth and creamy.
Gradually add the sugar and continue mixing until light and fluffy about 2 minutes. Don’t rush this step. Creaming properly gives you that soft texture.
Add the eggs one at a time, mixing well after each addition.
Stir in the vanilla extract.
With the mixer on low speed, add the dry ingredients in three additions. Mix just until combined don’t overmix.
The dough should be soft but not sticky. If it feels too soft to handle, that’s okay. Chilling is coming next.
Step 2: Divide and Color the Dough
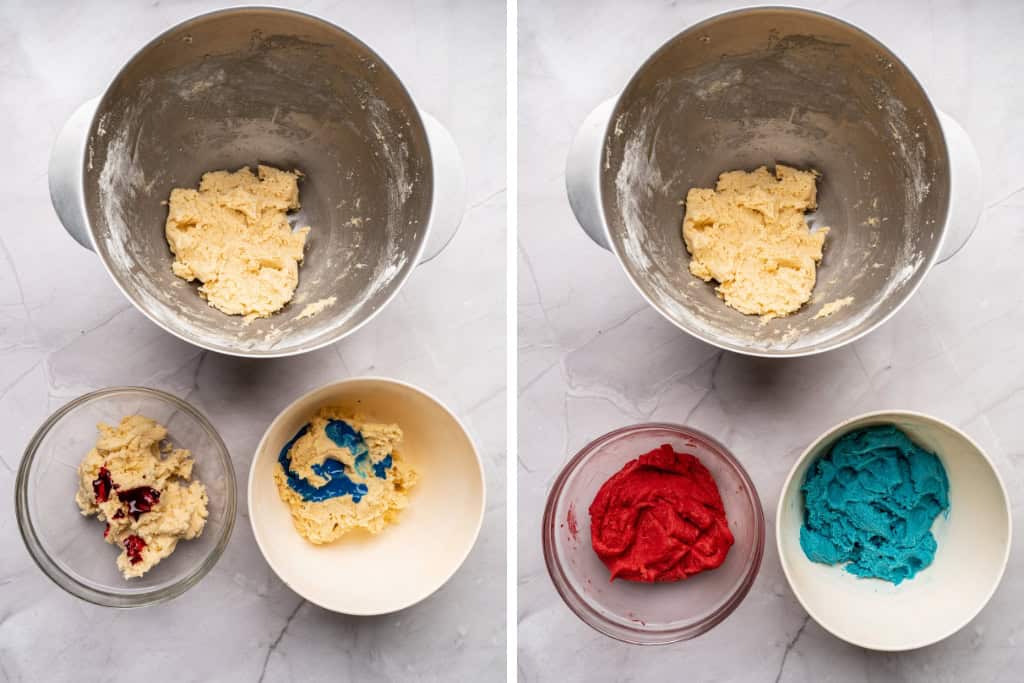
Divide the dough evenly into three bowls.
Leave one portion plain this will be your white layer.
Add red gel food coloring to one portion.
Add blue gel food coloring to the other portion.
Use gel coloring instead of liquid. It gives you vibrant color without changing the dough’s consistency.
Gently knead each colored portion until the color is evenly distributed. If your kids are helping, this is their favorite part just remind them not to overwork the dough.
Step 3: Chill the Dough
This step matters. I know chilling feels like the longest part, but it’s what keeps your layers neat and your pinwheels sharp.
Shape each portion into a flat rectangle.
Wrap tightly in plastic wrap.
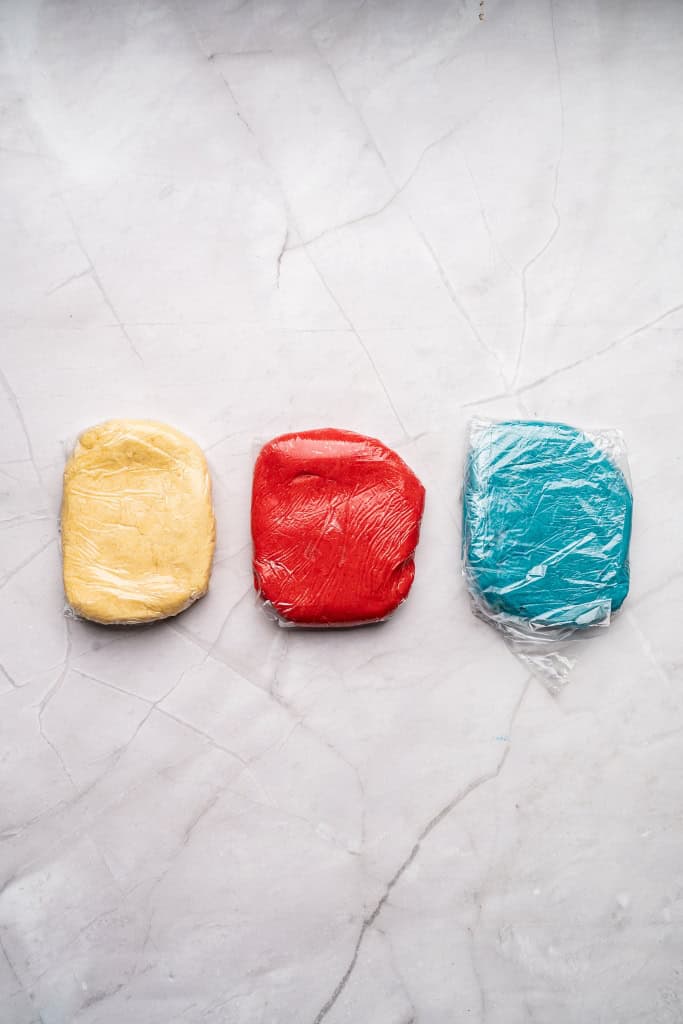
Refrigerate for at least 30 minutes.
You want the dough firm but still pliable. Too soft and it will squish. Too cold and it will crack.
Step 4: Layer and Roll
On a lightly floured surface, roll each dough portion into a rectangle of similar size and thickness.

Stack the red layer on top of the white layer.
Place the blue layer on top.
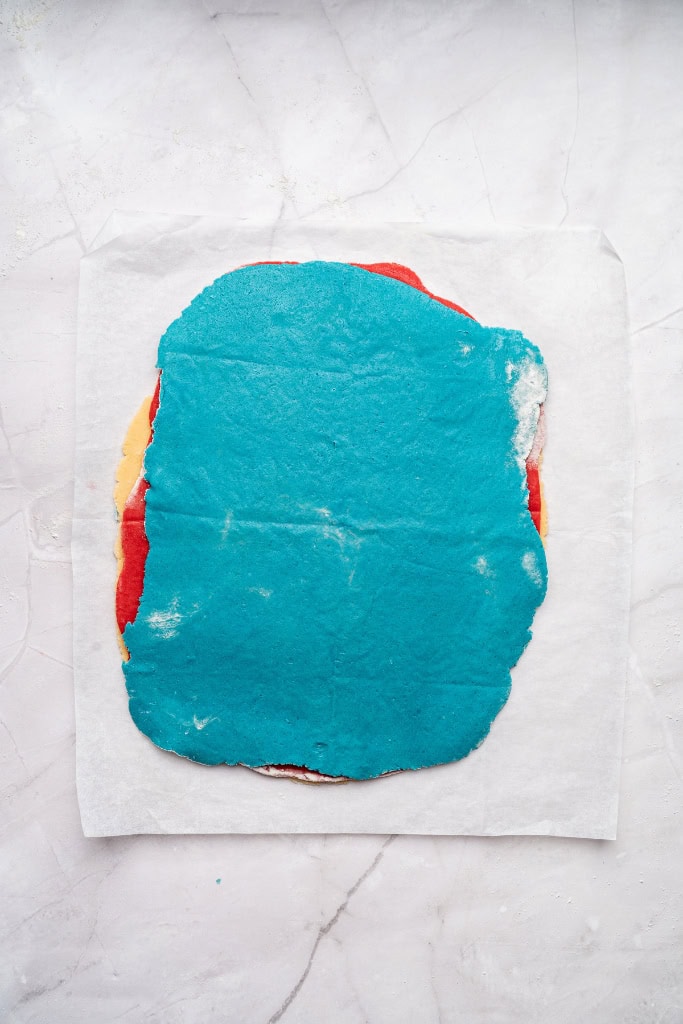
Press gently so the layers adhere don’t press so hard that the colors blend.
Starting from a short edge, roll the dough tightly into a log. Take your time here. Slow and steady gives you clean swirls.
Once rolled:
- Wrap the log tightly in plastic wrap.
- Refrigerate for at least 2 hours (or overnight).

This long chill is what keeps the cookies from spreading and keeps those colors crisp.
Step 5: Slice and Bake
Preheat your oven to 375°F (190°C).
Line baking sheets with parchment paper.
Slice the chilled log into ¼-inch thick rounds.
If the log flattens slightly while slicing, gently reshape it with your fingers.
Optional: Roll the edges in coarse sugar or sprinkles for a little sparkle.
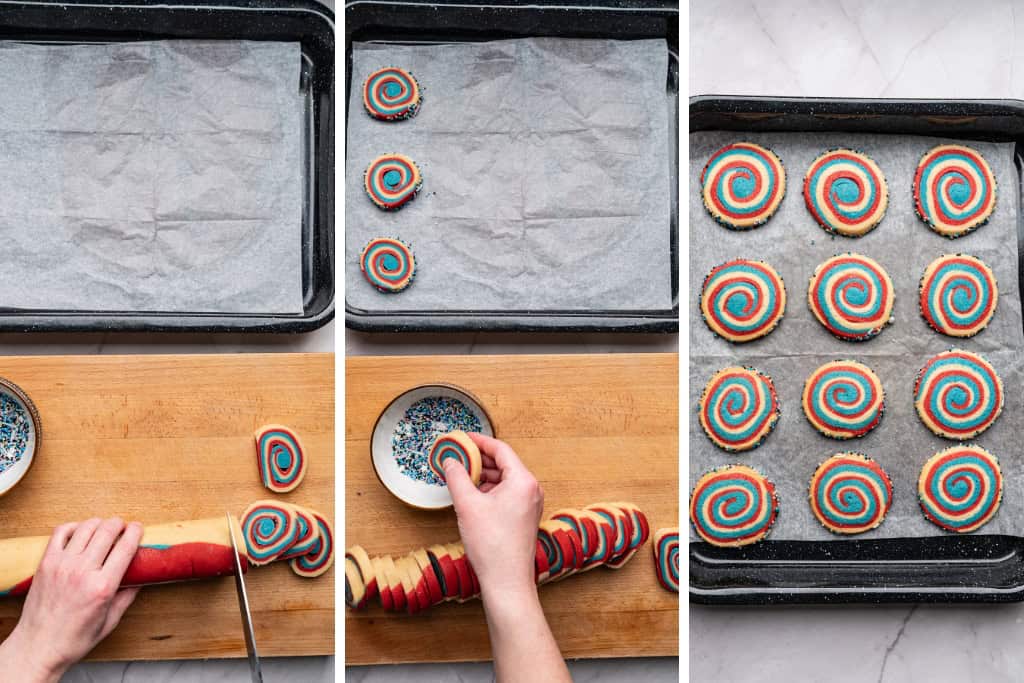
Place the cookies on your baking sheet with a bit of space between them. Bake for 8–10 minutes, until the edges are just set and the centers still look slightly soft.
Don’t wait for browning these are meant to stay light so the colors pop.
Step 6: Cool and Serve
Let the cookies cool on the baking sheet for a few minutes before transferring them to a wire rack. They will firm up as they cool.
Store in an airtight container at room temperature for up to 4 days if they last that long.
Real-Life Tips
1. Measure Flour Correctly
Too much flour makes dry cookies. Spoon it into your measuring cup and level it off don’t scoop directly from the bag.
2. Don’t Skip Chilling
If you try to rush this part, the cookies will spread and lose their swirl definition.
3. Use a Sharp Knife
Wipe the blade between cuts if the colors start smearing.
4. Rotate Your Pan
Halfway through baking, rotate your tray if your oven has hot spots.
Make-Ahead & Freezer Tips
If you’re planning for a big event, these are perfect to prep ahead.
- You can refrigerate the dough log for up to 3 days before slicing.
- You can freeze the log for up to 2 months. Wrap it tightly in plastic wrap and then foil.
- You can even freeze sliced, unbaked cookies and bake straight from frozen just add 1–2 extra minutes to baking time.
This is a lifesaver during busy holiday weeks.
Fun Ways to Serve Patriotic Pinwheel Cookies
These cookies fit into so many celebrations:
- Fourth of July BBQ
- Memorial Day gatherings
- Veterans Day events
- School patriotic programs
- Election watch parties
- Military homecoming celebrations
Stack them on a white cake stand, tuck them into cellophane treat bags, or add them to a dessert charcuterie board with strawberries and blueberries.
They also make adorable hostess gifts tied with ribbon.
Troubleshooting Common Problems
Let’s talk about the little hiccups that sometimes happen.
My Colors Blended Together
- You may have pressed too firmly when stacking layers. Gentle pressure is key.
My Cookies Spread Too Much
- The dough likely wasn’t chilled long enough before baking.
My Dough Cracked While Rolling
- It was probably too cold. Let it sit at room temperature for 5–10 minutes before rolling.
The Log Isn’t Round
- That’s completely fixable. After slicing, gently reshape the rounds with your fingers.
Flavor Variations
Once you’re comfortable with this recipe, you can have so much fun with it.
- Add almond extract instead of vanilla for a bakery-style twist.
- Add lemon zest to brighten the flavor.
- Make pastel versions for baby showers.
- Try orange and black for Halloween.
- Use red and green for Christmas.
The technique stays the same just change the colors.
If you’ve ever hesitated to try pinwheel cookies because they looked complicated, let this be your sign to give them a go.
Take your time. Follow the steps. Trust the chill time. And remember even if your swirls aren’t perfectly symmetrical, they’ll still taste amazing.
Check Out More Patriotic Recipes
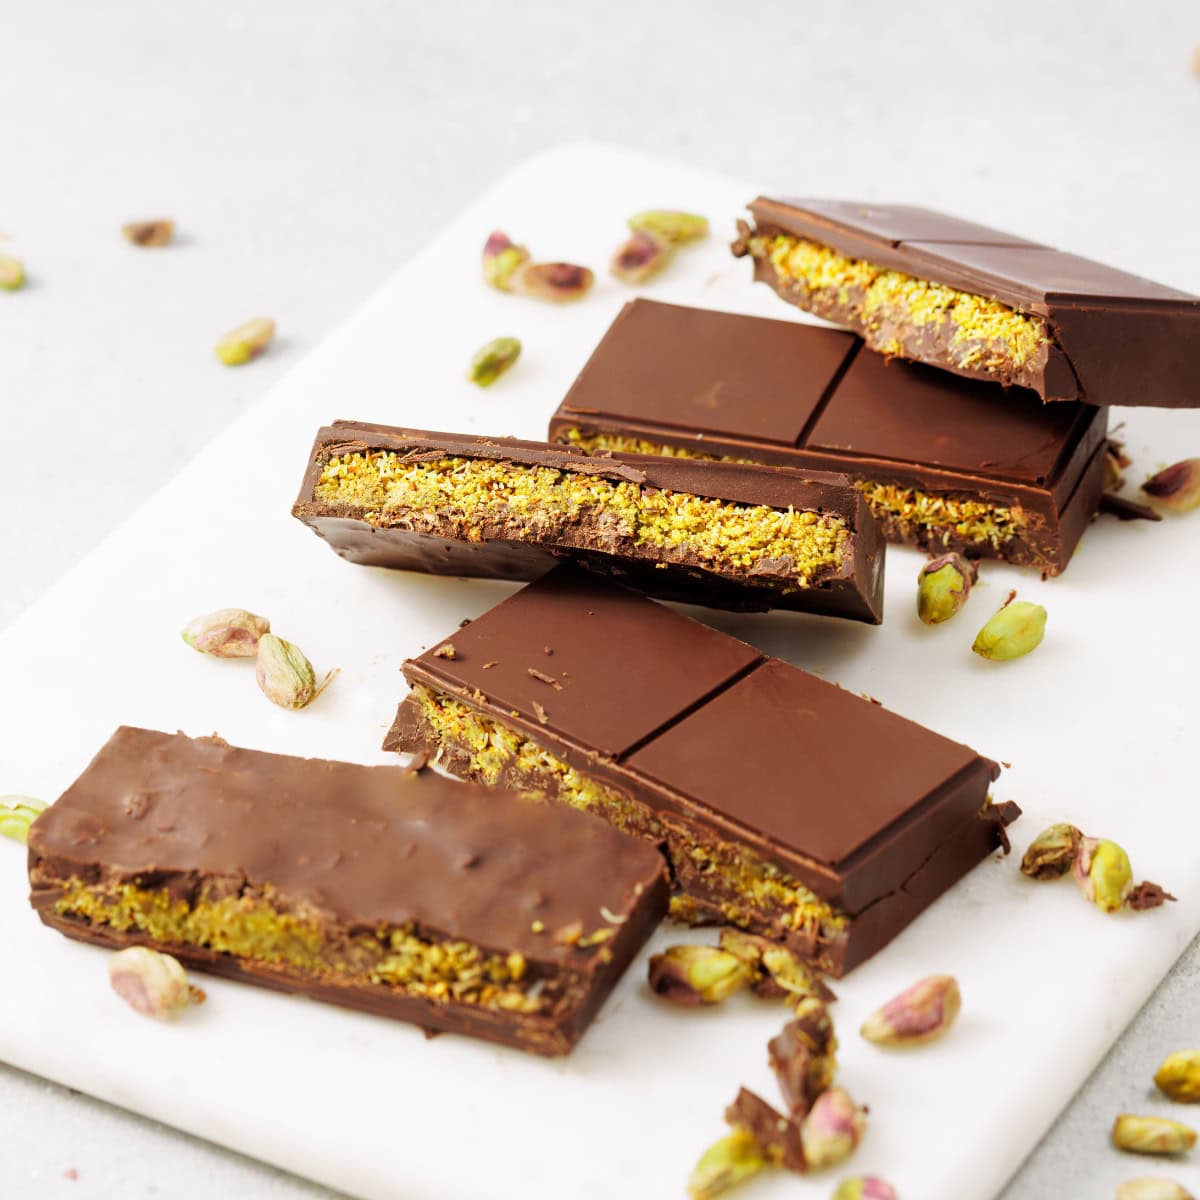
- Patriotic Chocolate Bark
- Patriotic Pretzel Rods
- Patriotic Chocolate Covered Twinkies
- Patriotic Oreos
- Patriotic Cupcakes
Patriotic Pinwheel Cookies
Ingredients
Dry Ingredients
- 3 cups all-purpose flour
- 2 teaspoons baking powder
- ½ teaspoon salt
Wet Ingredients
- 1⅓ cups unsalted butter, room temperature (about 2½ sticks / 300 g)
- 1½ cups granulated sugar (300 g)
- 2 large eggs
- 1 teaspoon vanilla extract
Coloring & Finishing
- Red gel food coloring
- Blue gel food coloring
- Optional: coarse sugar or sprinkles for rolling
Instructions
- In a medium bowl, whisk together the flour, baking powder, and salt. Set it aside.
- In a stand mixer fitted with the paddle attachment (or using a hand mixer), beat the butter on medium speed until smooth and creamy.
- Gradually add the sugar and continue mixing until light and fluffy about 2 minutes. Don’t rush this step. Creaming properly gives you that soft texture.
- Add the eggs one at a time, mixing well after each addition.
- Stir in the vanilla extract.
- With the mixer on low speed, add the dry ingredients in three additions. Mix just until combined don’t overmix.The dough should be soft but not sticky. If it feels too soft to handle, that’s okay.
- Divide the dough evenly into three bowls. Leave one portion plain this will be your white layer. Add red gel food coloring to one portion. Add blue gel food coloring to the other portion.Use gel coloring instead of liquid. It gives you vibrant color without changing the dough’s consistency.
- Gently knead each colored portion until the color is evenly distributed. If your kids are helping, this is their favorite part just remind them not to overwork the dough.
- Shape each portion into a flat rectangle. Wrap tightly in plastic wrap. Refrigerate for at least 30 minutes.You want the dough firm but still pliable. Too soft and it will squish. Too cold and it will crack.
- On a lightly floured surface, roll each dough portion into a rectangle of similar size and thickness.
- Stack the red layer on top of the white layer. Place the blue layer on top. Press gently so the layers adhere don’t press so hard that the colors blend.
- Starting from a short edge, roll the dough tightly into a log. Take your time here. Slow and steady gives you clean swirls.
- Once rolled: Wrap the log tightly in plastic wrap. Refrigerate for at least 2 hours (or overnight).This long chill is what keeps the cookies from spreading and keeps those colors crisp.
- Preheat your oven to 375°F (190°C).
- Line baking sheets with parchment paper.
- Slice the chilled log into ¼-inch thick rounds. If the log flattens slightly while slicing, gently reshape it with your fingers.
- Optional: Roll the edges in coarse sugar or sprinkles for a little sparkle.
- Place the cookies on your baking sheet with a bit of space between them. Bake for 8–10 minutes, until the edges are just set and the centers still look slightly soft. Don’t wait for browning these are meant to stay light so the colors pop.
- Let the cookies cool on the baking sheet for a few minutes before transferring them to a wire rack. They will firm up as they cool.
- Store in an airtight container at room temperature for up to 4 days if they last that long.